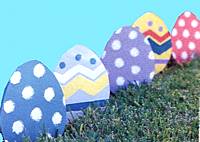
| Yard Eggs |
| |
|
|
| |
| Materials Needed |
10 X 12-inch piece of 3/8"
thick plywood or scrap wood
8-inches of 1 X 2 or lattice for the garden stake
White primer paints
Acrylic or latex paints, color of choice
Paintbrushes
cotton balls or dabber for dots
two wood screws to attach the stake to the egg
Butcher paper or poster board for a template
Sandpaper
Saber saw or similar cutting tool
Clear Polyurethane for the finish |
| Directions |
Making the pattern:
- Using your butcher paper or poster board, fold in half.
- Draw on 1/2 egg shape so that when you open it up, it will be
the same on both sides.
- Cut this out, this is now your template.
Cut your wood:
- Trace your template onto the wood and cut with your saber saw
or similar cutting tool.
- The wood you have chosen for your stake can be cut now too.
Make sure you cut a point at one end for it to stick securely in
the ground.
Apply primer:
- You can apply the primer now to both sides of the egg. You can
also choose to use wood putty first to fill any flaws or pits in
the wood.
- Let this dry.
Decorate:
- Paint background color to both sides of the egg. It is not
necessary to paint both sides if only one side will be seen, but
make sure you don't forget to seal the side that is not painted as
well. Let background dry.
- Use various colors to paint on zig zags, dots, lines etc. Let
dry.
Finish it off:
- To finish off your egg (s), Center the stake on the back
bottom of the egg. Make sure it is centered so you don't have a
lop sided egg. Keep 4-5 inches sticking out the bottom of the egg.
- Using your wood screws, attach the stake to the egg.
- Apply a polyurethane or waterproofing finish to protect the
egg (s) from weather. Let dry and enjoy. Don't forget to follow
all manufacturers directions when using chemicals.
|
|