Wine Rack
Here is a rack for one dozen average size wine bottles. Longer or higher
racks can be designed using spacing shown but some variation in timber
thickness, width, etc., may be necessary.
| TOOLS YOU WILL NEED | MATERIALS YOU WILL NEED | |
|---|---|---|
|
TIMBER Timber: Seasoned softwood DAR for decorative rack, otherwise sawn hardwood or softwood 1550x25mm, 1piece 75x25mm, 1 piece 2.7m |
HARDWARE
|
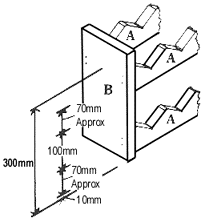
Cut these four rails
from the pieces 75x25mmx2.7m. Each rail to be exactly 600mm long

Mark out
each of the four pieces 'A' as below. Drill six 6mm holes as shown in Step 2, then cut each triangular piece out using hand-saw or jig saw, cutting into the prepared 6mm holes. Smooth off each rail each of the four pieces 'A' with sand paper or sander.

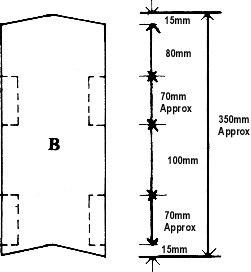
Cut two end pieces
'B' from the piece 150x25x600mm. Each piece should be exactly 300mm long.


Attach rails
'A'
to ends 'B' at spacing shown using two 50x2.8mm nails at
each end. Punch nail heads. Not: Pre-drill nail holes but locate to avoid
timber splitting and penetration into bottle retaining space. Smooth down,
fill nail holes, etc., stian, clear finish, paint etc, as desired.
Design Variations
 |
 |
 |
DEMOUNTABLE RACKUse screw fastening instead of nailing so that rack can be diassembled as required. |
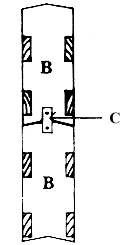
STACKING RACKSCut two sides 'B' from a timber piece 150x25x900mm DAR and to shapes shown. Assemble as indicated using location clamp or clip. |
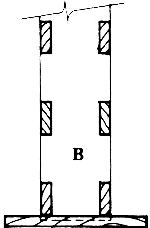
TALL RACKSVery tall racks could be unstable because of height. Use standards or racking design but add a 'foot' to each side of the rack depending on space available. Use an added 'foot' to each side of the rack depending on space available. Use an added 'foot' equal to about normal bottle length. Use, for example, one 'foot' each end, cut to 75x50x300mm DAR. |