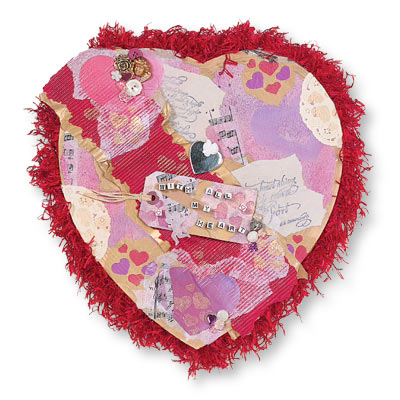
Valentine Candy Box

Instructions:
For best results, please read all instructions before beginning project. Refer to photo for color and design placement.
| 1. | Spray paint the top and bottom of cardboard candy box with gold. Let dry. |
| 2. | Squeeze desired paint colors onto foil. Tap into paint with a Paint Sponge. You may want to cut sponges into smaller pieces. Evenly coat stamp with paint. Be careful not to overload. Press stamp onto both colors of the tissue paper using even pressure. Lift the stamp straight up. Re-ink the stamp for additional images. Clean stamps with warm soapy water. |
| 3. | Tear the stamped tissue paper into pieces. Brush a coat of Instant Decoupage onto box. Place the tissue into wet glue. Brush a coat of glue over the tissue. If necessary, carefully press out air bubbles with finger. Repeat tissue process on tag. Let glue dry. |
| 4. | Using a rubber stamp with special sayings, stamp the words onto the tissue using rubber stamp pad with permanent black ink. Let ink dry. Apply to top of box same as stamped images above. Glue pieces of red corrugated paper across the middle of the box. Stamped images on tissue are glued over the corrugated paper. |
| 5. | Glue the alphabet letter beads onto the tag with Thick Designer Glue. Glue tag, buttons, and beads to box top. Glue trim to the underneath section of the lid. Let glue dry. |