Materials:
- Sides: Two 32" boards - 1" x 8" pine
- Shelves: Three 18" boards - 1" x 6" pine
- Top piece: One 18" board - 1" x 10" pine
- Bottom piece: One 18" board - 1" x 8" pine
- Towel rung (optional) - One 18" piece of 5/8" hardwood dowelling
- Glue
- White shellac or clear, water-based urethane
- 1-1/2" screws
|
Tools
- Clamps
- Square
- Drill and drill bits
- Tape measure
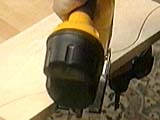
- Jigsaw
- Plug cutter
- Flush cut trim saw
- Sander
|
Steps:

Draw the shape on one side piece |
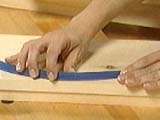
Use drawing aids to help get the shape |
|
|
| Draw a shape you like for the sidepieces. If you're feeling
rakishly confident, mark the shape directly onto the board. If
you're feeling tentative, draw the shape on cardboard first and cut
it out so you're sure it looks okay. Trace the design onto the
boards and cut them out using a jigsaw. |
|

The top and bottom pieces will be symmetrical |
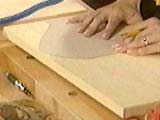
Trace half of the shape on the top and bottom pieces |
Flip the template and trace the shape on the other half |
Use a jig saw to cut out the pieces |
| Next, draw the scrolled shape you want for the top piece. The
easiest method is to take a nine inch wide piece of cardboard and
draw the design on it. Cut the design out, trace it onto one half of
the 18" wide board, then flip the cardboard over and trace it onto
the other half of the board. Now you have a symmetrical design.
Repeat for the bottom piece, altering the scrolling dimensions a bit
so it isn't exactly the same as the top. |
|
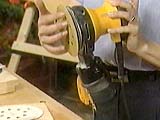
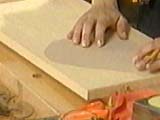
Orbital sanders work fast and efficiently |
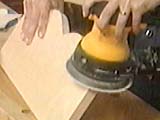
Sand all surfaces and edges |
Use a cornering tool or plane to speed up the sanding |
| Cut out all the pieces and sand smooth. Use a cornering tool or
block plane to ease all the sharp edges.
TIP: It's tempting to screw the whole thing together at this
point, but do yourself a favour and put the stain, paint or
clear-coat on the individual pieces NOW! It's way faster and easier
than having to cover all the surfaces of the shelf unit after it's
assembled. |
|
Lay out the pieces |
|
|
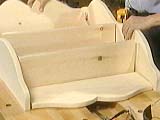
| Next, lay the whole thing out with sides, shelves and top and
bottom pieces in place. Square the shelves using a speed square.
Mark a light pencil line on the side pieces under each of the
shelves for reference so that you can assemble the unit fast once
you've put the glue on it. |
|
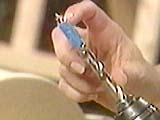
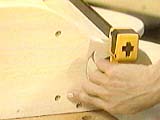
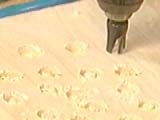
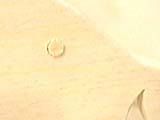
Using a brad point bit makes a clean hole for a plug |
Drill the plug hole about three-eighths of an inch deep |
Drill pilot holes for the screws |
| Pre-drill for the screws. I drilled extra deep holes for the
screw heads and filled the holes with plugs so you can't see the
screw heads. This is a great trick to give the shelf a professional
look. If you are using plugs, drill the plughole first using a
brad-point bit the same size as the plug cutter. Also pre-drill
pilot holes for the screws to prevent the shelves from splitting.
|
|
Apply the glue |
Clamp and screw the pieces together |
|
| Take everything apart, apply glue, reassemble, clamp, and screw.
|
|
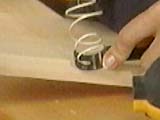
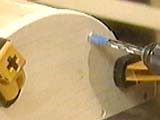
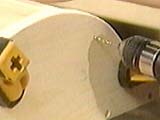
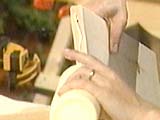
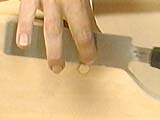
Use a plug cutter to make plugs from your project wood |
Pop them out with a knife |
Insert them in the hole with the grain running in the same direction
|
|
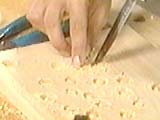
Cut off the plugs with a flush cut saw |
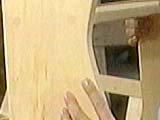
After sanding and finishing the plugs are almost invisible |
|
|
| You can buy pre-made hardwood plugs, or make your own with a
plug-cutter bit |
|
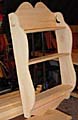
| Okay, now mount that baby and load 'er up with gels, sprays,
creams and pomade. Feel instantly better, largely because getting
all that stuff up off the bathroom counters adds 60 % more
reflective light, reducing the appearance of wrinkles. |
|
| |