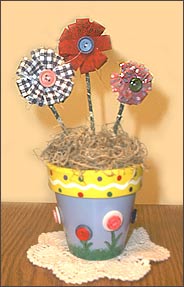
Pot
Paint clay pot light blue below the rim. Paint the rim yellow. Paint a squiggly
line around the center of the yellow rim with white. Paint various colors of
spots around the rim. Using green and a stipple brush, paint the grass using a
pouncing motion around the bottom of the pot. Paint various lengths of green
stems and leaves around the pot above the grass. Let dry.
Spray varnish the entire pot according to manufactures directions. Let dry.
Glue various size and color buttons above the painted stems. You can use a small button on a larger button for a fun effect.
Cut a piece of floral foam to fit inside your pot. Press foam into your pot and glue Spanish Moss over the foam to cover it.
Flowers
 Cut 15-20 strips of print fabric ½ inches wide by 1 ¾- 2 1/2 – inches long. The
longer you make your strips the bigger your flower will be. The more strips you
use the fuller your flower will be. You can make as many flowers as you would
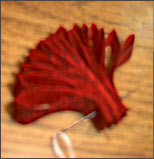
like for this project and you can make them various sizes. Thread a needle and
put aside. Fold each strip of fabric and stack them on top of each other with
raw edges even. Poke needle in through all layers of fabric near raw ends (see
fig. 1). Pull thread through fabric. Rotate each strip of fabric and adjust to
form a flower. Thread a button onto your needle and bring needle back through
button and back through fabric layers. Tie thread in back of flower and set
aside.
Cut 15-20 strips of print fabric ½ inches wide by 1 ¾- 2 1/2 – inches long. The
longer you make your strips the bigger your flower will be. The more strips you
use the fuller your flower will be. You can make as many flowers as you would
like for this project and you can make them various sizes. Thread a needle and
put aside. Fold each strip of fabric and stack them on top of each other with
raw edges even. Poke needle in through all layers of fabric near raw ends (see
fig. 1). Pull thread through fabric. Rotate each strip of fabric and adjust to
form a flower. Thread a button onto your needle and bring needle back through
button and back through fabric layers. Tie thread in back of flower and set
aside.
Stems
Cut a piece of wire desired length for stem plus 2 inches. Cut a strip of green
print ½ inch x 18 inches. Glue one end of fabric to end of wire and slowly wrap
strip around wire turning stem as you go. Leave 2 inches of the wire unwrapped
for inserting into your pot. Glue end of fabric to wire and cut any remaining
fabric off.
Glue the stem to the back of the flower. Poke unwrapped end of wire into your pot. Continue to make as many flowers for your pot as desired.