|
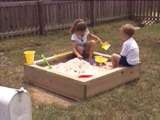
Building a Sandbox
From "Quick and
Easy Kids' Projects" Episode DIR-162
It's
easy to build a sandbox. All you need is some basic lumber.
Materials:
2" x 10" pressure-treated lumber
1/2" treated
plywood
3" galvanized deck screws
Pressure-treated 2" x 2" boards
Optional: 2" x 4" pressure-treated lumber
Drill, with drill bits,
spade bits and a Phillips driver bit
Circular saw
Marine-grade
rope
Safety glasses
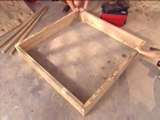
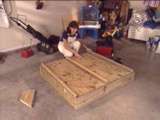
- Cut the 2" by 10" boards to the desired size, and dry-fit them
together (figure A). Drill pilot holes at each corner. Get a
helper to hold the boards in place while you drill the holes.
- Apply wood glue at each corner joint, and attach the boards with 3"
galvanized decking screws.
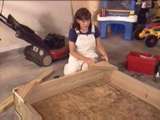
- Cut two pieces of pressure-treated plywood to match the outside
dimensions of the sandbox. Attach one of the pieces to the bottom of the
box (figure B).
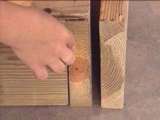
- Cut pressure-treated 2" by 2" boards to the length of the sandbox.
Attach one at each end and one in the middle (figure C) to
prevent the plywood from coming in contact with the ground.
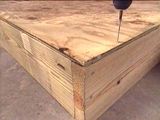
- Cut 90-degree triangles from the pressure-treated 2" by 10" boards,
and attach them at each corner (figure D) to provide additional
support for the box--as well as a place to sit.
- You might want to create ledger boards around the edges from
pressure-treated 2" by 4" lumber. To get the measurements for the
boards, lay them on top of the corner braces, flush with the edge, and
trace along the angle of the corner braces beneath the 2" by 4" board.
This will give you the proper angle for mitering the ledger boards.
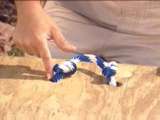
- Use the second piece of plywood to create a lid for the sandbox.
Make handles from marine-grade rope (figure E) by drilling holes
about 6" apart on either side of the lid and stringing the rope through.
Knot the rope underneath the lid so it doesn't come out.
Related Projects
> Sandbox and
Seesaw
> Fort and
Swing Set
> Setting Up a
Basketball Goal
> Tree
House
> Building
>
Playhouse
>
Building a
Children's Play Structure
> Building a
Balance Beam
> Tire
Toys
| |