|
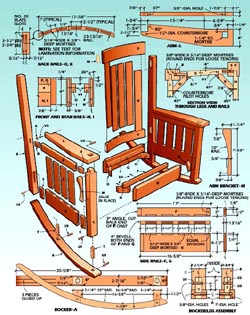
Legs and rails
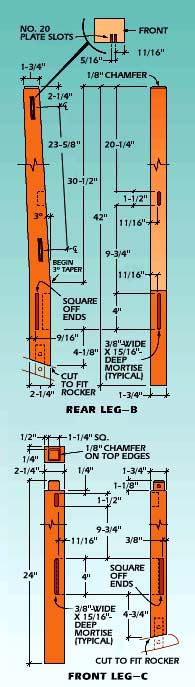
Cut blanks for the rear legs from 8/4 stock, then
trace the leg profile on each blank and use the band saw
to cut the legs.
Remember to stay to the waste side of the layout
line. Use a block plane to remove the saw marks and
finish shaping the legs. Rip and crosscut the front leg
posts to rough length as shown in the plan. Note that
all legs will be cut to final length after assembly,
because they must be fit to the curve of the rockers.
Lay out the mortise locations in the leg posts. The
front and back seat rails are joined to the posts by
traditional mortise-and-tenon joints. Since the side
rails join the posts at an angle, we used loose tenons
to make these joints, simplifying the joint-cutting
process and still yielding a strong connection between
the parts.
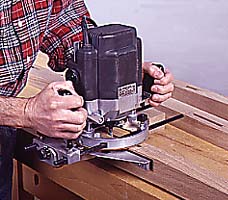
The easiest way to cut the mortises is to use an
up-cut spiral bit in the plunge router with an edge
guide to register the cuts. Clamp a leg blank between
bench dogs and make several passes to cut the mortises
to finished depth.
These mortises are 1/16 in. deeper than the
corresponding tenons to allow for excess glue at the
bottom of the joint.
The mortises that house the loose tenons can retain
their rounded ends since it is simple to shape those
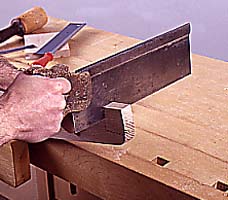
tenons to match. The mortises for the front and back
rails, however, should be cut square at each end to
match the normal tenon profile. Use a sharp chisel to
make these cuts.
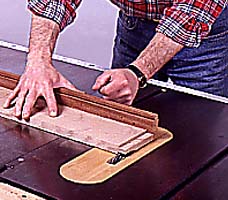
Cut the front and back rails to finished size, then
use a dado blade in a table saw to cut the tenons on the
rail ends. After making the cheek cuts, readjust the
blade height and cut the top and bottom shoulders on the
tenons.
Next, cut the 30 degrees chamfer along the top edge
of the front seat rail using a table saw or a router
with chamfer bit. Then, rip the side rails to width and
cut them to length with the appropriate angled cuts.
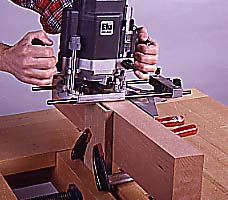
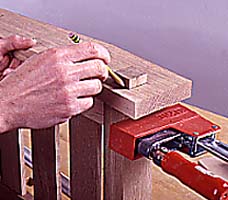
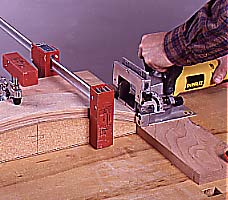
In order to cut the mortises for the loose tenons in
the ends of the side rails, you will have to provide an
auxiliary support for the router base. Since the rail
ends are cut at a 4 degrees angle, you can rip the same
angle along the edge of a piece of stock at least 2 in.
thick x 4 in. wide x 16 in. long. Clamp this piece flush
to the end of the railto both support the router base
and provide a registration surface for the edge guide.
Make two or three passes to achieve the finished mortise
depth.
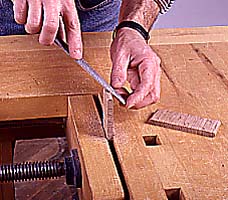
Cut two lengths of 3/8-in.-thick stock for the loose
tenons. Rip one piece 1 1/2 in. wide and the other 4 in.
wide, then use the miter gauge on the table saw to cut
the tenons to length. Note that the grain of the tenons
must run perpendicular to the joint to provide adequate
strength. Clamp each tenon in the bench vise, then use a
rasp to shape its top and bottom ends to fit the mortise
.
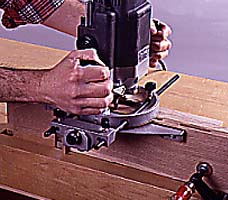
Slats and arms
Rip and crosscut 5/16-in.-thick stock for both the
side and back slats. Then, lay out the mortises for the
slats in the side rails. Clamp a rail between bench dogs
and use the router to cut the mortises. Be sure to
support the router base by clamping two or three boards
to the side of the rail. When you cut the end mortises,
adjust the support boards so that they extend several
inches past the end of the rail Square the ends of the
slat mortises with a sharp chisel.
Use a dado blade in the table saw to cut the through
tenons on the end of the front leg posts. Cut these
tenons 1/4 to 3/8 in. longer than the finished
dimension.
Next, cut blanks for the chair arms from 1-in.-thick
stock. Make a template for the arm shape from
1/4-in.-thick plywood or hardboard, then trace the shape
onto the arm blanks. Use the band saw or sabre saw to
cut the arms to shape (except for the notch that fits
around the back leg post). Keep in mind that the cut
that fits against the front side of the back leg must
correspond to the angle of the leg. Clamp the arm in the
bench vise and use a hand saw to make the cuts .
Lay out the through mortises in the chair arms,
scribing the outlines of the mortise with a sharp knife.
Next, drill a 1-in.-dia. hole through the armcentered
in the mortiseto remove most of the waste. Complete the
mortise by chopping out the waste with a sharp chisel.
Test the fit of the tenon in the mortise, and adjust as
required.
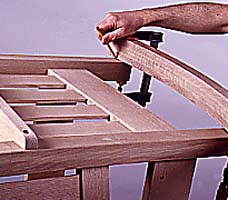
Dry assemble a chair side, holding the parts together
with clamps. Slip an arm over the appropriate through
tenon and mark the tenon at the point that it protrudes
through the arm. Disassemble the side and cut the tenon
1/8 in. beyond the mark. Use a sharp chisel to chamfer
the end of the tenon 1/8 in. on each side.
Back rails
The back rails of the chair are formed by laminating
strips of oak to achieve the necessary curved profile.
The outer surfaces of the rails must match the
quarter-sawn material of the rest of the chair, so these
layers are sawn from a piece of quarter-sawn stock. Rip
one piece of 13/16-in.-thick stock 3 3/4 in. wide and
one piece 3 in. wide. Then crosscut them both to 24 in.
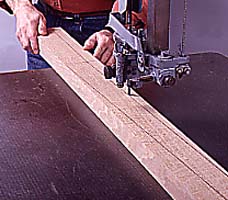
long. Clamp a tall fence to the band saw table to resaw
1/8-in.-thick strips, one from each side of both these
boards. When laminating the rails, place the smooth side
of these strips toward the center of the rail, to
present a better gluing surface.
For the sake of economy, and to make the job easier,
we used 1/16-in.-thick white oak veneer for the inner
plies of the rails. The combination of two outer layers
1/8 in. thick and seven inner layers 1/16 in. thick
yields a perfect 13/16-in.-thick rail. (This veneer is
available from a number of mail-order suppliers. We used
Certainly Wood, 11753 Big Tree Rd., East Aurora, NY
14052.)
The forms for gluing up the back rails are fabricated
by stacking up five layers of 3/4-in.-thick MDF
(medium-density fiberboard) or particleboard. You'll
need a panel at least 28 in. wide x 64 in. long. When
cut, each set of forms should measure 24 in. wide x 12
in. long.
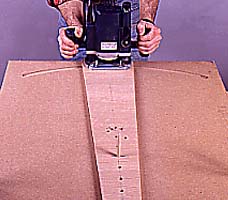
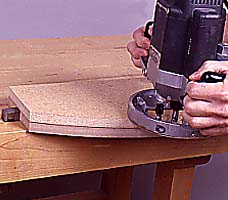
Begin by generating the appropriate curve, using our
drawing as a guide. Then, construct a trammel base for
the router and install a 13/16-in.-dia. straight bit in
the router collet . Measure from the inside edge of the
bit to a point 23 in. down the trammel and bore a 3/8-
in.-dia. hole. Then place the trammel on the form stock,
bore a corresponding hole in the form panel and pin the
two together with a short length of 3/8-in. dowel. Make
a series of router passes along this arc until you have
cut through the stock. Be sure to leave some material
uncut at both ends of the arc so that the 13/16-in.
space is maintained. When the routing is done, cut the
two arc shapes from the form stock. These two pieces
will be the first layers of the male and female forms
for your rails. Then trace these shapes onto the
additional form material and rough-cut the other layers
to within 1/4 in. of the finished shape. Add one layer
at a time to the form with screws, then use a flush
cutting bit in the router to trim it to shape . When all
five layers are added to each form, place alignment
lines across the forms to keep both sides properly
oriented during glue-up. Apply two coats of wax to the
inner surfaces of the forms to keep glue from sticking
to them.
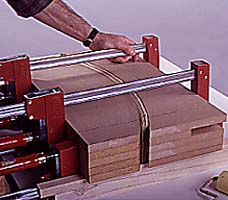
Use a short-nap roller to spread glue on the mating
surfaces of all rail plies. Be sure not to leave any dry
spots on the veneer faces. Place the veneer sandwich
between the male and female forms and use clamps, both
below and above, to squeeze the forms together . Leave
the rail clamped for at least 8 hours, then repeat the
process for the second rail.
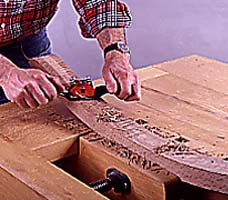
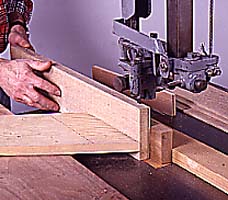
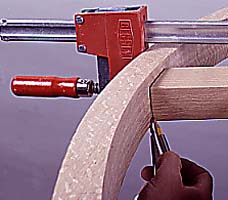
Use a cabinet scraper to smooth the band saw marks
left on the faces of both rails. Then plane one edge of
each rail flat and square to the face and use the band
saw with a fence to rip the rails to width. Scrape or
plane the cut edge to remove the saw marks.
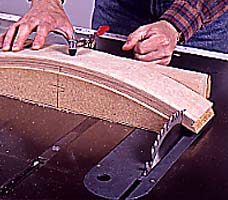
The male gluing form can now be modified to act as a
jig for sawing the rails to finished length. Cut the
form to the finished dimension of the rails, which is 17
7/8 in., making sure to center the arc in the middle of
the form. Screw a block to the back side of the form and
add a holddown clamp to the top of this block. Then
position the form along the table saw miter gauge, so
that the end of the form aligns with the near side of
the blade, and temporarily screw the form to the miter
gauge. Place one of the rails on the form, secure it
with the holddown clamp, and cut one end of the rail .
Then, reverse the rail in the form, aligning the cut end
with the opposite end of the form, and make the second
cut.
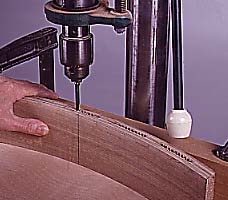
Finish up the rails by laying out the back slat
mortises. Use a 1/4-in.-dia. bit in the drill press to
bore out most of the waste . Then chop out the rest with
a sharp chisel. Test fit each slat in its mortise. |