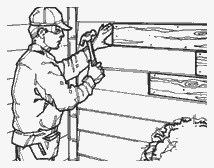
Repairing Wood Siding
You
work very hard to make the interior and the backyard of your house as beautiful
as possible, but do you look at the exterior of your house? This is the first
thing that people see when they walk by or visit, so make sure it looks as nice
as the inside of your house. The most common problem with the house is the wood
siding. Wood siding is constantly exposed to the elements which often cause
minor damages like splitting, buckling, cracks, etc. Replacing a damaged piece
of side can be done by yourself (Of course, some siding damage is extensive. If
you have major damage, like an entire wall that has to be replaced, call a
professional.)
Tools and Materials You Need:
- Electronic stud finder
- Blocks of wood to use as spacers
- Keyhole saw
- Pry bar
- Tape measure
- Tapered wood siding
- Wood preservative/sealer
- Rig-shank siding nails
- Paintable caulk
- Primer
- House paint or stain
Tip: Good woods that
stand up to the elements are cedar, pine or hardwood particleboard.
 Mark Lines to Cut Around
Damaged Area:
- Use the electronic stud finder
and find the studs that are around the damaged area. Studs are the vertical
2x4s that make up the house's framework. Always mark cut lines in the center
of the studs.
Tip: Stagger the cut lines because this makes the siding stronger.
Remove Damaged Boards:
- Work from the bottom up. Place
the spacers (the blocks of wood) under the board above it. Use the keyhole saw
at an angle to make little starting cuts at the top of the cut lines. Now use
the keyhole saw normally and cut down through the board. Remove the boards.
You may need to use the pry bar to remove the damaged board. Repeat this
process, working from the bottom up, until all the damaged boards are removed.
Cut Replacement Boards:
- Use the old boards as templates
and cut the replacement boards. If the old boards are too damaged, you have to
measure the space where the board goes. Before you put up the new boards, make
sure that you put wood preservative all over the boards back, front, sides and
ends. This helps keep them weather resistant.
Tip: When you measure
the space for the replacement board, subtract about 1/8 inch on each end. You
have to take off the 1/8 inch to allow for swelling and expansion caused by
weather conditions.
Attach Replacement
Boards:
- Nail the boards onto your house
working from the bottom up. When positioning the board, make sure that the
tapered end is on top. Use the ring-shank siding nails and nail the board into
place. Nail along the bottom of the board at about 12 inch intervals. Nail the
new board to the board below. Repeat this procedure with the next board.
Paint or Stain:
- Fill the cracks between the old
and new boards (the 1/8-inch cracks left from before) with paintable caulk.
Prime and paint or stain the new boards to match the rest of the house.
 Mark Lines to Cut Around
Damaged Area:
  Mark Lines to Cut Around
Damaged Area: