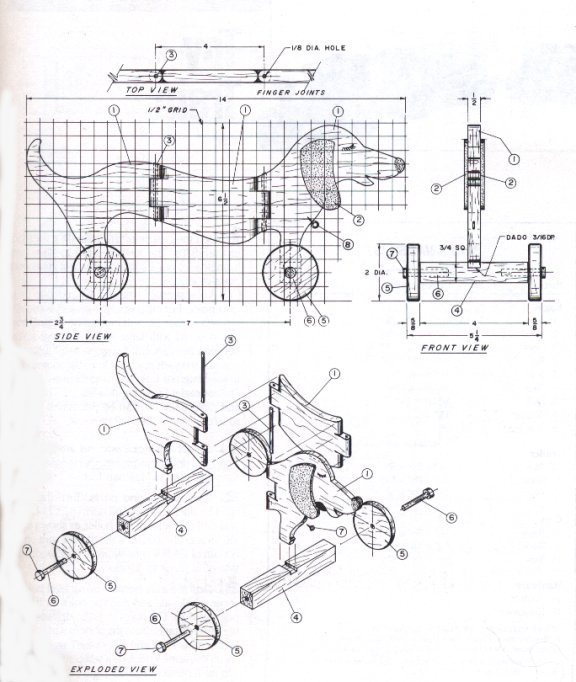
| MATERIALS LIST | ||
|---|---|---|
| Part | Dimensions | Quantity |
| 1. Body | 1/2" x 6 1/2" x 14" | 1 |
| 2. Ears | 1/8" x 2" x 2 3/4" | 2 |
| 3. Hinge pins | 1/8" dia. x 2 1/2" | 2 |
| 4. Axles | 3/4" x 3/4" x 4" | 2 |
| 5. Wheels* | 5/8" x 2" dia. | 4 |
| 6. Axle pegs* | 7/32" dia. x 1 1/2" | 4 |
| 7. Eye screw | 1 | |
| 8. String | Cut to fit | as needed |
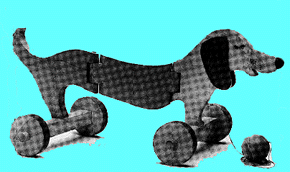
1. Select the stock and cut the body segments, I suggest using
straight-grained maple or birch. First, make paper patterns of both the dog and
his ears(parts 1 and 2). Draw a grid with 1/2-in. squares and enlarge the parts
onto it. Transfer the enlargements to the stock, leaving at least 1/2 in.
between the segments.
Cut the parts to shape.
2. Drill the hinge pin holes. Temporarily assemble the three body
segments and tape them together. Make sure that they are in proper alignment and
that the hinge joints are snug. Locate and drill the holes for the two hinge
pins (part 3), as shown in the top view, taking care to drill straight down.
Temporarily put the hinge pins - made from 1/8-in.-diameter hardwood dowels- in
place and remove the tape. Sand the profile of the dog so that one segment seems
to flow into the other along the length of the body. This work goes quickly on a
drum sander mounted on a drill press.
Remove the hinge pins and round the hinge joints with a rasp so that the
segments can each swivel approximately 90 degrees in either direction. Refer to
the exploded view to see the finished shape of the hinges. As you work, check
your progress by reassembling the dog. The fit should be loose but not sloppy.
3. Make the wheels and axles. You can either cut the wheels (part
5) out of 5/8-in.-thick stock with a circle cutter in a drill press or buy them
at your local hardware or craft store.
Cut out the axles (part 4). Notch them to take the feet of the dog. Drill
7/32-in.-diameter holes, roughly 1 1/4 in. deep, in the center of the axle ends
to take the axle pegs (part 6).
4. Assemble the dog. You can glue up axle pegs or turn them if you have a lathe, but I've found it's easier to purchase them from the your local hardware or craft store. Slip the pegs through the wheel holes and glue them in the axles, making sure the cap on the end of the axle doesn't bind against the wheel. Glue the dog's feet to the axles and glue on the ears.
5. Apply finish. You can leave the dog unfinished or apply a
varnish or fanciful paint job. When the finish has dried, glue the hinge pins in
place; place the glue in the top and bottom holes only, or the joints won't
turn.
Install the eye screw (part 7), tie on a length of string (part 8), and take
your dog for a walk.