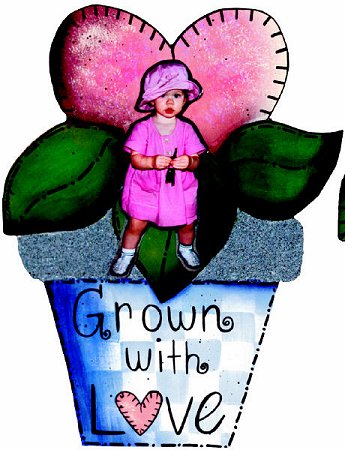
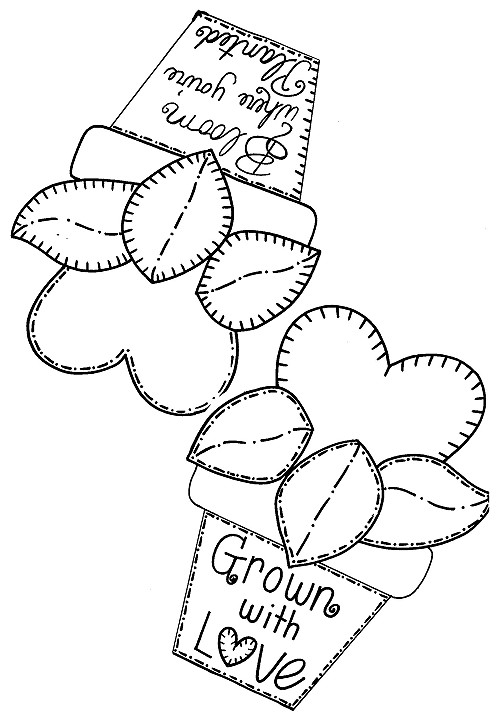
Memory Pots
| Instructions
|
| PREPARATION - Cut out matboard
using sharp scissors. Use stylus and graphite paper to lightly transfer
designs. PAINTING INSTRUCTIONS GROWN WITH LOVE POT 1. With 3/4" flat shader, basecoat leaves with Hunter Green. Shade with #12 shader and Dark Hauser Green. Use 3/4" flat shader to highlight with drybrush strokes of Thermal Green. 2. Basecoat the heart with Misty Mauve. Use deerfoot brush to stipple with Orchid and Snow White. With #12 brush, shade with Black Plum and drybrush highlights with Sizzling Pink. Use 3/4" flat shader to highlight right side with Titanium White. 3. Use #12 flat shader to paint checks on the pot in Country Blue. Shade with Prussian Blue. 4. Use 3/4" flat shader to paint rim of the pot Blue Shale. 5. Spatter with Ebony Black using fan brush or old toothbrush. 6. Lettering and detailing are done with a permanent black ink pen. Glue on desired photograph. BLOOM WHERE YOU'RE PLANTED POT 1. With 3/4" flat shader, basecoat leaves with Hunter Green. Use #12 brush to shade with Dark Hauser Green and highlight with drybrush strokes of Thermal Green. 2. Paint checks on heart using #12 brush with Golden Halo and Country Blue. Shade blue checks with Prussian Blue. 3. Use 3/4" flat shader to paint rim of pot Blue Shale. 4. Also use 3/4" brush to basecoat the pot with Shadow Tan. Use deerfoot brush to stipple with Earth Brown, Golden Halo and Copper. Shade with Burnt Sienna. 5. Spatter with Ebony Black, using fan brush or old toothbrush. 6. Lettering and detailing is done with permanent black ink pen. Glue on desired photograph. |