Materials:
- Legs - 3 feet of 2" x 2" maple
- Apron - 4 feet of 1" x 3" maple
- Corner braces - 2 feet of 1" x 2" maple
- Top - 14" x 14" - 3/4" plywood 1
- 2 - 2" wood screws
- 14" x 14" x 2" foam
- 25" x 25" fabric
- Staples or upholstery tacks
- Carpenter's glue
- De-waxed clear shellac
- Aniline powdered dyes
|
Tools
- Power planer
- Belt sander
- Biscuit joiner and biscuits
- Circular saw or handsaw
- Clamps
- Staple gun
- Soft finish brush
- Sponge brushes
|
Cut List:
- Legs - Four 9-inch pieces of 2" x 2" maple
- Apron - Four 10-inch pieces of 1" x 3" maple
- Top - One 14"x14" piece of ¾" plywood
- Braces - Four 1"x2"x6" corner braces with 45-degree angle on each
end.
|
|
Steps:

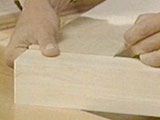
Choose the prettiest surfaces, looking for iridescence and curly
figures in the wood |
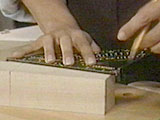
Place a mark one half inch below where the apron will be
|
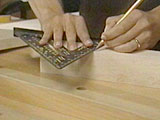
Continue the line around all four sides |
Design Basics
Figure out a design for your ottoman. You can make a cardboard
mock-up and test it out for size in front of the chair where it will
be used. When you're happy with the size and shape of the mock-up,
measure the finished height and subtract the thickness of the foam
and plywood. Then cut the legs to that length. Look at your lumber
carefully to determine which are the prettiest sides, and position
them with best sides facing outward.
Measure the overall outside dimensions of your mock-up and
subtract the size of the legs. Cut the 1" x 3" apron material to
that length. Put the pieces of 1" x 3" in place between the legs and
check the overall look again, making any necessary adjustments.
TIP: Number the legs and the apron pieces so that they can
be accurately returned to their location. |
|
Draw the angle of the taper |
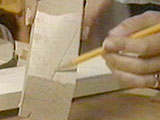
The taper lines, ready to be planed |
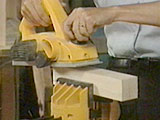
Plane a taper onto each side |
Taper 'Em
To taper the inside surfaces of the legs, which is traditional and
quite pleasing to the eye, it takes a little work but it's worth it.
The taper will be on the two inside surfaces, but the two outside
surfaces will remain flat.
With all the pieces in place make a mark on the leg about 1/2"
away from the apron. Use a square to continue the line around the
leg on all four sides. Next, on the bottom of the leg, measure in 1"
from each of the outside surfaces. Make a little 1" box on the
outside corner. Now, connect the corner of the box to the line near
the apron. (See picture.) This will indicate the finished dimensions
of the leg after tapering. |
|
Begin planing against the grain on the thick end of the taper
|

Finish going with the grain |
|
| Clamp the leg securely and use a power planer to remove the
excess wood to within 1/16" of the taper line. Continue planing the
inside edges of all four legs.
TIP: It is easier to start planning the larger part of the
taper first from the bottom up. This will, however, cause the wood
to chip because of the direction of the grain. After you have gotten
your planed line parallel to the pencil line and about 1/8th inch
away, reverse the direction and plane from the top of the leg down.
This will help to take out any chips that you might have made going
against the grain. |
|
Sand the pieces smooth |
Ease the sharp edges last |
Complete the sanding by hand as necessary |
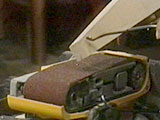
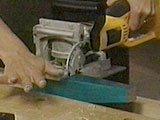
Sand Ahoy!
Use a belt sander mounted upside down on your bench to remove and
smooth out all the surfaces on the legs and the apron. Start with a
40-grit belt for the surfaces that have pits left from planning and
work up to 220-grit. Be sure to round over the sharp edges on the
last pass with the 220 belt. Otherwise you'll split your shin if you
ever bump into the ottoman, and where's the fun in that? |
|
Sanding belt eraser |
|
|
Another Tip:
In the belt sander section of the hardware store, look for a belt
cleaner, which looks like a large beige rubber eraser. It is used to
clean sanding belts which extends their working life. Just hold the
eraser firmly against the belt while it's running and the sawdust
stuck on the surface will instantly disappear. |
|
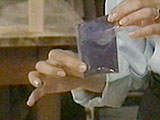
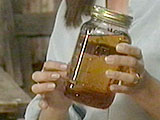
Aniline stain |
Clear shellac |
|
To Dye For
Once all the surfaces are sanded to your liking, apply a finish of
powdered aniline dye mixed with clear, de-waxed shellac.
Both aniline dyes and shellac are available at Lee Valley Tools. The
shellac should be mixed to about a 1 lb cut (i.e. One pound of dried
shellac flakes to one gallon of shellac thinner or de-natured
alcohol - BUT NEVER MAKE THIS MUCH AT A TIME! It's only good for a
few months once it's mixed, so make small batches.) |
|
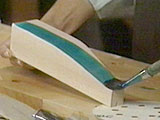
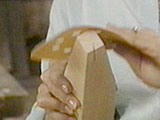
Brush on in one long stroke |
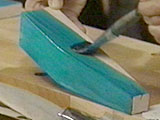
Overlap the brush strokes a tiny bit |
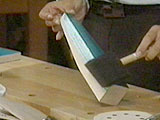
Remove any excess quickly with a dry sponge brush |
| You'll have to experiment with the aniline powder mixed into the
shellac to get just the right depth of colour. I used about one
quarter of an envelope of Peacock Blue aniline powder in
approximately a half-pint of liquid shellac. The great thing about
making your own aniline finish as opposed to using paint or even
stain is that the intense dyes bring out the grain and iridescent
quality of the maple. |
|
Where the biscuit fits in the joint |
Cutting a slot in a leg |
Slot made for the biscuit in the end of an apron piece |
Frisky Biscuits
Once the shellac is dry (only takes about 20 minutes), make a pencil
mark lightly on the centre line of each apron piece at each end
where it butts against a leg. Then hold the first apron piece in
place against the leg and transfer that center-line to the leg.
Continue to mark all the legs, lining up the apron mark with a
corresponding mark on the leg.Determine the size of biscuit to be
used (see your machine's instructions) and set the biscuit joiner to
that size. Adjust the blade of the joiner so that it will cut a slot
right in the center of the apron board where it joins the leg. Be
sure your joiner is unplugged while working close to the blade
making adjustment! Once everything is lined up, cut slots in all the
ends of the apron pieces. |
|
Biscuit in place in the side of the leg |
|
|
| Next, set the blade so that it will cut 1/4" lower (this will
inset the apron and make it look nicer) and cut slots in the sides
of each leg. Use the centre line that you transferred to the leg
from the apron to line up the biscuit joiner. Glue and clamp all the
pieces together checking that the ottoman is square. |
|
Corner brace |
|
|
Brace to the Finish
While the pieces are still clamped, cut four identical corner braces
to fit in the corners around the legs. When the pieces are screwed
in place they will brace the legs as well as providing a way to
attach the top to the frame. Drill perpendicular holes in each
pointed end of the brace and counter sink them. The hole drilled in
the brace should be LARGE enough that the screw can slip through it
BUT the hole in the apron (where the screw attaches) will have to be
SMALL enough to catch the threads. Also, be careful not to burst
through the front of the apron when drilling with the smaller bit.
Attach the corner brace using 2" screws. Note: leave 1/4" to 1/2"
between the brace and the top of the ottoman so that there is room
for the fabric. |
|
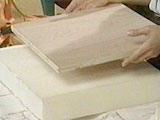
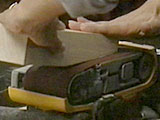
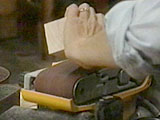
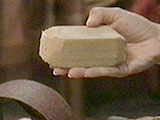
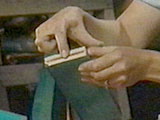
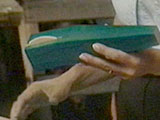
Plywood and foam |
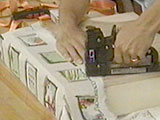
Staple the material on one side |

Then staple the other |
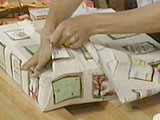
Make a nice fold in the corner and staple it in place |
|
|
Up on Upholstery
Once in place, drill holes in the centre of each brace and counter
sink them. Cut a piece of 3/4" plywood the exact size of the outside
dimension of the ottoman. Cut a piece of foam to fit, choose a
fabric, stretch it around the foam and plywood and then staple it to
the bottom of the plywood. Attach the plywood top by driving screws
through the corner braces into the plywood.
TIP: Use a bread knife to cut the foam and cut it about
1/4" larger than the plywood. It helps to add a little on each side
so that it can compress a bit. |
|
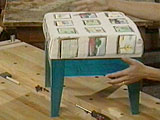
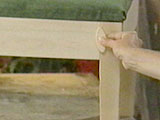
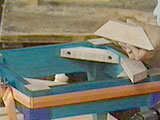
Finished ottoman |
|
|
| Now after all this standing around working, you deserve to put
your feet up. If only you had a nice ottoman.
Wait a minute. YOU DO HAVE A NICE OTTOMAN! |
|
| |