Materials:
- 25 - 1"x2" maple strips 32" long
- Carpenters glue
- Mineral oil or butcher block oil
|
Tools
- Bar clamps - two minimum
- Clamps - any others you may have
- Putty knife
- Circular saw
- Plane
- Belt sander
|
Tip:
- When shopping for maple, choose the straightest boards you can
find, using the 'eye-balling' technique; pull a board off the rack,
rest one end of it on the floor, then site down the length of the
board with one eye. If the board is twisted, cupped, warped, or has
knots in the edges, it will immediately register with your eye. Put
that board aside and move on to the next candidate. Be picky. If you
aren't picky you'll come home with wonky lumber, which will horrify
you when you try to clamp it into a flat plane.
|
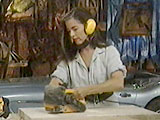
| All you need is glue, a few tools and some maple, which is the
wood traditionally used in butcher blocks. Maple is available in the
'project wood' section in most home centers. My all-purpose cutting
board is huge at 20" x 30" because I chop with abandon and like lots
of space. You might like your cutting board to be even bigger, or
you might prefer to make little individual garlic chopping-boards,
which are all the rage in upscale kitchen stores. Either way, it's
going to be a glue carnival, so tie your hair back (I learned the
hard way) and get ready to stick 'em up. |
|
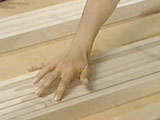
Sort the boards putting knots down |
The top should be even and clear of knots |
|
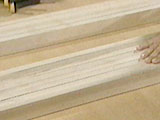
| Board Stiff
Start by cutting your boards to length and laying them out. Place
them on edge, side by side. Arrange the boards so that they bow in
the same direction, and number them from 1 - 25. If any of the edges
have knots, turn the board over so that the clearest side is up.
Now take the first five boards and set the rest aside. You have
to glue in units of five because the glue will dry faster than you
can work. |
|
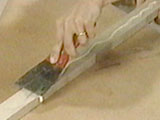
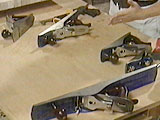
Apply glue on each side that touches another |
Place the boards in the pipe clamps and even up the ends
|
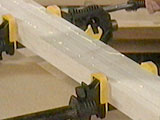
Snug the clamps up and adjust as necessary |
| Glue Love
Apply a bead of glue to the sides of each board, smoothing the
glue into an even layer with a putty knife. Place the gluey boards
in bar clamps, checking the numbers so they're in the right order.
Check that the boards are lined up evenly at the ends. Now snug them
together with clamps. Don't over-tighten the clamps yet. First,
adjust the boards as necessary for height, pushing them up or down
to achieve a level plane. When you're satisfied, thoroughly tighten
up all the clamps and leave for at least twenty minutes. |
|
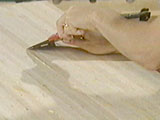
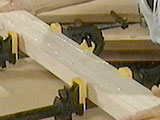
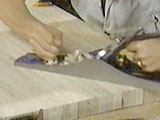
Glue the five larger pieces together and scrape off the excess glue
|
|
|
| Repeat the process for each clump of five boards
until you have five units of five. Now glue all five units together
using the same clamping technique. Let the glue set up for at least
twenty minutes, then unclamp your cutting board.
At this point it's probably not looking good. Some of the boards
are sticking up and there are yellow rivulets of dried glue
everywhere including on your shoes. This is normal. |
|
08 - Starting with larger planes will provide a flatter surface
|
A large plane will provide the flattest surface |
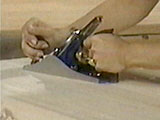
A jack plane will also do a great job |
| Plane Truth
Use a hand plane to take at least 1/8 of an inch off the surface
of both sides, smoothing out the high spots. Planing is vigorous
work. Take a wide stance and move the plane over the surface
diagonally, using an even stroke. This will be nigh on impossible at
first, because all the different little edges and glue rivulets trip
up your blade. Persevere. You'll never be brave if you have a cushy
life and this is one way to develop fortitude. |
|
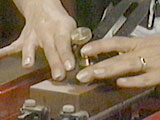
Sharpen the blade of a new plane on an 800 grit water stone
|
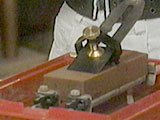
Use a jig to hold the blade fixed while sharpening |
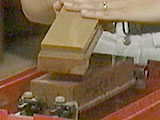
Finish on a 1200 grit water stone |
Apply honing compound to a leather strop to finish |
Strop both sides of the blade |
|
|
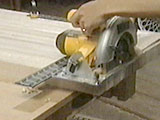
Use a circular saw to trim the ends |
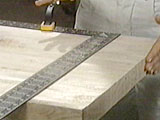
Use a square as a cutting guide |
|
| Once you've planed both surfaces, trim about 1/2" off each end
using a circular saw (or a handsaw if you want nice deltoid
muscles). |
|
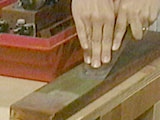
Sand using progressively finer sanding belts |
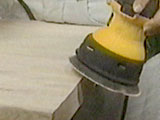
Soften the sharp edge with an orbital sander |
|
| Now sand all surfaces with an orbital or belt sander. Start with
coarse grit sandpaper, like 40 or 60. Once you've got the surface
smooth, move up through the grits of sandpaper to 80, 100, 120 and
up as high as you like. I went to 600 but I'm a sanding geek. |
|
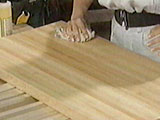
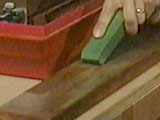
Oil the finished cutting board on both sides and ends |
|
|
| Oil all sides of the finished block with mineral oil, tie a bow
around it, and put that baby away until Christmas. |
|
| |