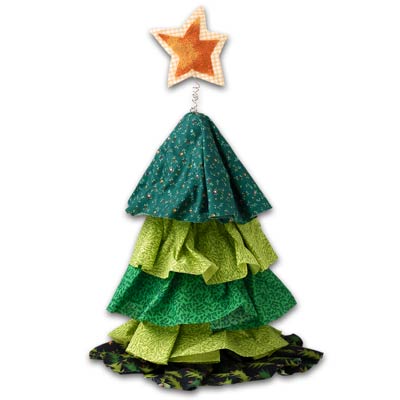
Layered Christmas Tree

Materials Needed:
Fabrics, light
green, dark green and yellow
Cone form
Craft wire, gold, 20-gauge- length 12”
Rubber bands
Scissors
Shirtboard
Instructions:
For best results, please read all instructions before beginning project. Refer to photo for color and design placement.
| 1. | Cut dark green fabric into three pieces: 28” square, 20” square and 12” square. |
| 2. | Cut light green fabric into two pieces: 24” square and 16” square. |
| 3. | Cut yellow fabric
into 6” square. To make circles: fold fabric into quarters and mark an arc along open edges with the center of the arc at the folded corner (see diagram). Cut along arc. |
| 4. | Lay the largest circle on a flat surface and cover completely with Stiffen-Quik. Drape over cone, smoothing and arranging folds. Tie loosely or secure with rubber band at base. Let dry. |
| 5. | Remove fabric from cone. Measure 2” from bottom of cone form and cut off; set aside. |
| 6. | Repeat step 4 and 5 with 24” circle, then with remaining circles working from largest to smallest. |
| 7. | Cut two stars of each size out of yellow fabric and spray with Stiffen-Quik. Glue wrong sides together with wire sandwiched between. Let dry. |
| 8. | Glue cone back together with Foamtastic. |
| 9. | Clip holes in tips of fabric cones. |
| 10. | Stack fabric cones over cone form, largest to smallest and run wire for star through all the cones and secure by pushing into foam. |