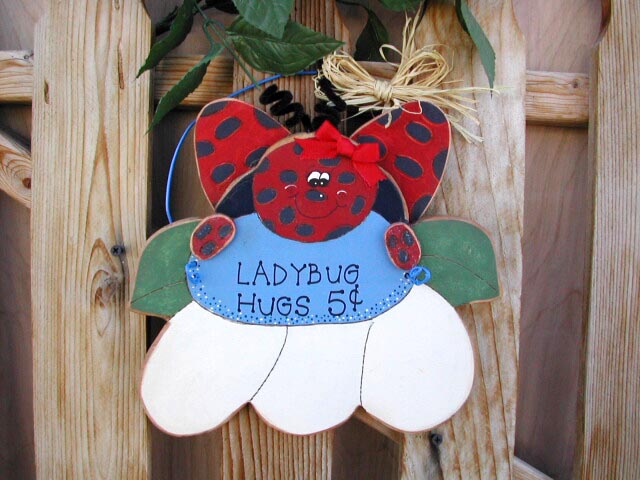
Ladybug Hugs
|
1/2" Wood and 1/4" Wood 1 Black pipe cleaner (cut in half) 1 Blue child's wire hanger or (19 gauge wire) 1 Black technical pen Wood Glue, and Hot Glue Gun Antique Maple Gel Stain 1 Piece of red ribbon (for bow on ladybug) Hand full of Raffia (for bow on wire) |
Cutting Instructions: 1/2" Wood: Ladybug and flower 1/4" Wood: Wings and hands |
Palette:
|
Tomato Spice |
Ivory |
Charcoal |
|
Bungalow Blue |
Light Foliage |
Navy Blue |
| Med. Foliage |
Wood Burning Instructions:
I always do my wood burning line work before
I start to base paint my project. If paint gets in any of the burned areas
don't worry, I always go back over the lines with my wood burning tool to
remove any unwanted paint after I'm done painting .
Painting Instructions:
Base:
1. TOMATO SPICE: Face, Wings and Hands
2. CHARCOAL: Arms
3. BUNGALOW BLUE: Top of flower
4. IVORY: Peddles of flowers
5. MEDIUM FOLIAGE: Leaves
Details:
6. CHARCOAL: Put Ladybug spots on face, wings and hands, Paint eyes, nose,
mouth and put freckles on cheeks.
7. LIGHT FOLIAGE: Spatter leaves with old toothbrush.
8. IVORY: Put dots on flowers with your styles, paint eyes.
9. NAVY BLUE: Put dots on flowers with your styles.
10. BLACK TECHNICAL PEN: Put the saying "Ladybug Hugs" on the flower.
11. SANDING: Sand along the edges of the painted areas on all wood pieces.
12. ANTIQUE MAPLE STAIN GEL: Stain along the edges you just sanded
Assembly:
13. GLUE: Wings and arms to the Ladybug with Wood glue, Hot Glue Bow.
14. ATTACH: Blue wire from hanger, Raffia bow and Black Pipe Cleaner.