 Material
List
Material
List 10 - 1.75 x 1.75 x 24 in.
6 - 1.75 x 1.75 x 16 in.
10 - 1.75 x 1.75 x 12 in.
Material
List
10 - 1.75 x 1.75 x 24 in.
6 - 1.75 x 1.75 x 16 in.
10 - 1.75 x 1.75 x 12 in.
Steps
1. Glue squares together to form a piece that is approximately 76 inches by 10.5 inches (shown in figure A-1). Alternate the sizes to create the butcher block effect.
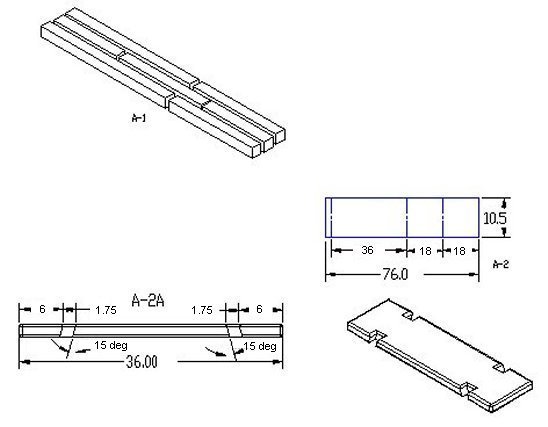
2. Once the glue has had the proper amount of time to set, the piece that was formed now needs to be planed or sanded flat.
3. The next step is to cut the piece into 3 separate lengths 36in, 18in and 18in. The 36 inch piece will be used for the bench and the 18 inch piece will be used for the legs. (A-2)
4. The next step is to cut the angles in the bench with a table saw. Set the 36 inch piece on edge with the miter gage set at 15 degrees. The blade should be set at around 1.75 inches high to cut to a joint so the piece may be removed by knocking it out after the cuts have been made. The width of the cut will vary depending on the thickness that the legs were planed. Shown in figure A-2A.
5. Cut 15 degree angles on the legs as shown in figure A-3.
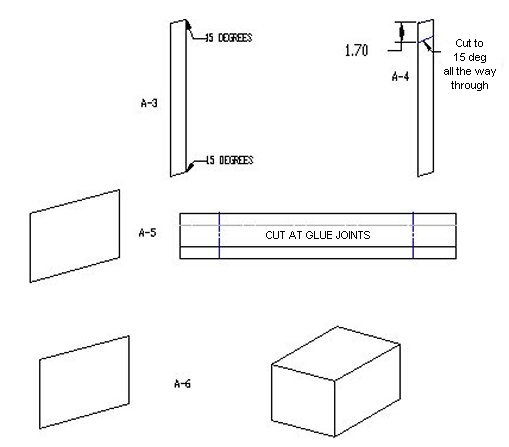
6. Make another 15 degree cut as shown in figure A-4 to form 2 pieces.
7. You will now have 2 pieces for each leg. The next step is to use the smaller piece that you just cut to make the 2 tendons that will be used to join the legs and the bench. (A-5)
8. Once the tendon is cut out as shown in figure A-6, they may then be glued on the legs as shown in the full drawings.
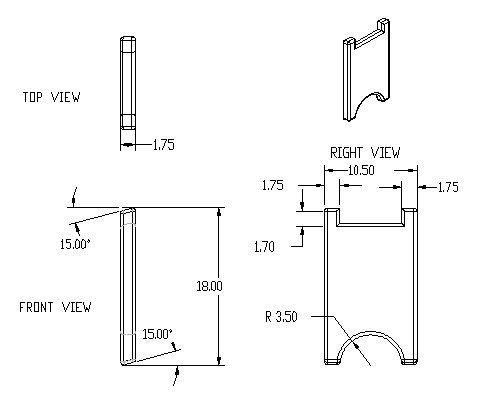
9. Once the glue has properly dried, the arch may be cut in the legs. It's radius is 3.5 inches.
10. All pieces should be rough sanded before putting the bench together.
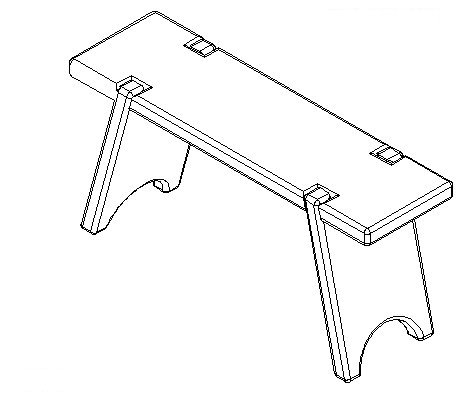
11. The bench may now be assembled. It will probably be necessary to sand and remove material on the bench grooves to allow the legs to fit properly.
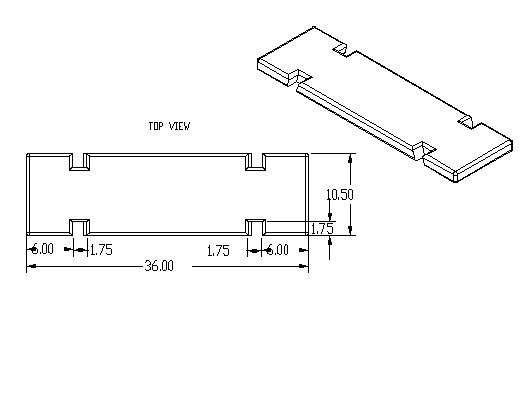
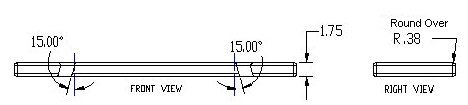
12. Once the pieces fit together properly, the bench may be rounded over with a router and a bit of your choice.
13. The project is now ready for a final sanding and a finish of your choice.