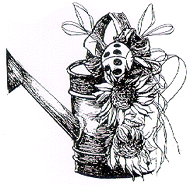
Basic Material Needed
Arrange-It Multi-Project Kit
Plastic Sheet
Spray bottle with water
Paper Towels
Decorative Items
Metal Watering Can
4 Yards cotton ribbon
4 Strands raffia (optional)
3 Flower heads
8 Leaves (leftover)
6" Floral wire |

|
Directions
1. Make a 6 loop bow. Secure with floral wire.
2. Lay watering can on it's side. Squirt a line of Arrange-It on side of
can. Place flower heads into wet Arrange-It. Arrange leaves around
flowers, reserving a few for the handle.
3. Add a small spot of Arrange-It to lower part of handle. Place bow into
wet Arrange-It. Add remaining leaves around bow edges.
4. Add a small spot of Arrange-It on center of bow. Place flower into wet
Arrange-It. Let watering can dry on it's side for 30 minutes.
Preparation
1. Cover work surface with plastic.
2. Use at room temperature.
3. Wear gloves, apron, or old work clothes.
Clean Up
1. Remove Arrange-It immediately form skin when wet with
Clean-It.
2. To reuse valve and craft tip: Clean frequently with Clean-It. Remove
craft tip and squirt Clean-It through it. Squirt Clean-It into valve and
tip, and empty residue.
Note:
Arrange-it is a weather-proof, permanent adhesive and floral foam
combined. Weatherproof florals, Latex fruit and vegetables, raffia or
ribbon may be used. |