|
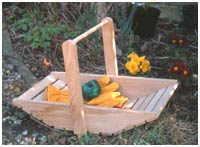 Here's
a simple project which takes very little timber and can probably be made
from offcuts. As it's intended for outside use, try to find some good pieces
of hardwood - I used oak. The suggested sizes can be easily altered to suit
your needs. Why not make a range of sizes to suit all the members of the
family? When gluing up, remember to use waterproof glue. Here's
a simple project which takes very little timber and can probably be made
from offcuts. As it's intended for outside use, try to find some good pieces
of hardwood - I used oak. The suggested sizes can be easily altered to suit
your needs. Why not make a range of sizes to suit all the members of the
family? When gluing up, remember to use waterproof glue. |
| |
|
Step-by-Step |
 |
 |
 |
Mark out the sides and cut them to shape. To
make sure that they're identical, fix them together with double-sided tape
or clamps and plane the edges smooth. |
 |
 |
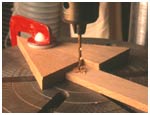
Cut all the slats to length, then drill 4mm pilot holes for
the screws. It's worth making a simple jig with two pieces of timber clamped
to a drill press to hold the slats in place while the holes are bored. |
 |
 |
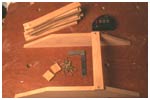
Fix the first slat at one end of the flat section using
brass screws which won't react with the tannic acid in the oak when it gets
wet. |
 |
 |
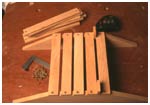
Fit the other slats using a square to ensure that they're
accurately aligned. To make the spacing between the slats even, you can make
up a pair of spacer blocks, though on such a small project it's just as easy
to align them by eye. It'll help to keep the base rigid if a few of the
slats are glued in place, though you don't need to glue them all. |
 |
 |
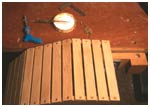
If you've spaced the slats correctly, there should be five
across the base and four at each angled end. |
 |
 |
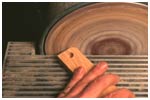
The handle is made from two supports with a piece of 12mm
dowel glued between them. Cut the pieces square and then mark the position
of the hole for the dowel. Use a drill press if possible to make the hole.
The top of each handle support can then be rounded over on a disc sander. |
 |
 |
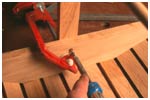
Finally, the handle is fitted to the base with screws
inserted from the inside of the base. Mark the position of the handle
carefully to ensure that it's central and vertical, otherwise the trug won't
balance properly when carried. Use a clamp to hold it in place while the
screws are driven home. |
| |
|
Finishing |
 |
| You can simply leave the wood untreated and
allow it to weather naturally, or there's a wide range of coloured finishes
that are available for exterior use which can look attractive.
Alternatively, a coating of Danish oil will give some protection. Avoid
using any surface treatment such as paint because it will soon get chipped
and flake off. |
| |
|
Cutting List |
 |
 Here's
a simple project which takes very little timber and can probably be made
from offcuts. As it's intended for outside use, try to find some good pieces
of hardwood - I used oak. The suggested sizes can be easily altered to suit
your needs. Why not make a range of sizes to suit all the members of the
family? When gluing up, remember to use waterproof glue.


