Materials:
- 2x4 pressure treated or cedar 5 - 8' pieces
- 1/2" Exterior grade plywood 1 - 4x8 sheet
- 5/8" Decorative siding plywood 1 - 4x8 sheet
- 1x2" cedar used for trim 4 - 8' pieces
- 3" Zinc screws for the framing
- 1-1/2" or 2" Zinc screws for the plywood
- Three sets of hinges for two doors and one lid
- Hardware to keep the doors closed
- Bundle of cedar shingles
- Piece of 15# tar paper roofing felt
- Copper or galvanized cedar roofing nails (ask where you get the
shingles)
|
Tools
- Saws - Handsaw, jig saw or circular saw for cutting plywood and
2x4
- Drill/Driver
- Clamps
- Staple gun
- Square
- Pencil
- Eye and ear protection
- Measuring tape
- Utility knife
|
Steps:
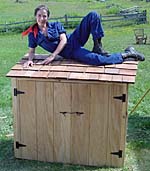
| This garbage hutch features shed-roof construction and basic
framing. It has a plywood floor to allow the cans to slide easily in
and out. The hinged roof is shingled with cedar to make it
picturesque. I sheathed the walls of my hutch with T-111 siding, but
exterior grade plywood would work too. |
|
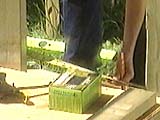
Make a floor out of pressure treated 2x4 and exterior grade half
inch plywood |
|
Hutch Obliged
For the floor, screw together a 24" x 48" rectangle using
pressure-treated 2x4 lumber and 3" zinc screws. Then cut a piece of
plywood to size and screw it down to the rectangle using 1- 1/2"
screws. |
|
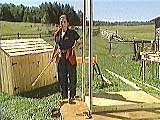
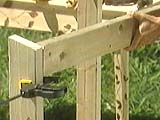
Clamp two long 2x4s to one end of the floor |
Square them to the floor |
Measure the front post six and one half inches above the height of
your garbage cans |
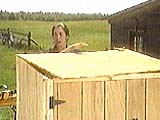
| To figure out the pitch for the roof, clamp two vertical 2x4
posts to the 24" x 48" rectangle, one at the front corner, and one
at the back corner. Use a square to make sure the two boards are
perfectly squared to the floor surface. |
|

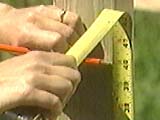
Clamp a straight edge on the front post and experiment with the roof
pitch |

Mark the pitch angle on the posts and cut on the line |
Take the dimensions for the top pieces near the bottom |
| Now, holding a yardstick or a spare piece of lumber against the
two vertical posts, experiment with how you want the roofline to
look. You can make the roof-pitch any angle you want, but the
determining factor is the front height. If you don't make sure that
you account for the height of the floor, so that the low point at
the front of the roof measures at least 6" higher than the height of
your garbage cans, then by the time the whole hutch is framed and
the doors are on, there won't be enough clearance to get the cans
out through the front doors! |
|
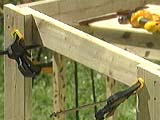
Use clamps to balance the boards while attaching them |

The angle for the rafters is the same as the one cut on the side
posts |
|
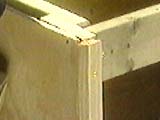
| After you've marked the roofline with confidence on the vertical
posts, unclamp and cut them. Then cut two identical boards to make a
second set of corner posts for the other side. Attach them with 3"
zinc screws, making sure they're nice and plumb. By the way, long
zinc screws are hard to drive at the best of times, let alone
through gnarly pressure-treated wood, so do yourself the favour of
pre-drilling for the screws. |
|
Attach using three inch zinc screws |
Toe-screw a center support to the back |
|
| Now, join all the vertical posts at the top with horizontal
members. This will provide a frame to which you can attach plywood
siding. |
|
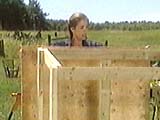
Cut and attach the plywood to the back and sides
|
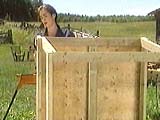
Use the plywood to square up the framing as you go |
To mark the angle hold the plywood in place and mark |
Hutch and Go
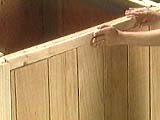
Measure, cut and attach three pieces of siding to fit the back and
two sides of the hutch. Cut the pieces 1/2" short in height, so that
they don't rest right on the ground at the bottom and wick moisture,
hastening rot.
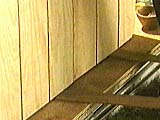
Use the framing as a guide to mark the angled cut line for the
two sidepieces. If you are using decorative siding that has a good
side and a rough side, you'll need to mark each side individually,
rather than just cutting two identical pieces. |
|
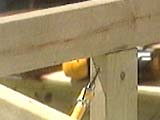
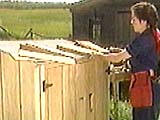
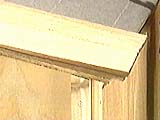
Attach 1x2 trim on the front sides and along the top |
|
|
| As you install the siding, square up the frame, racking it as
necessary. Trim out the hutch by screwing 1" x 2" cedar boards in
place at the corners, and along the sides and top front edge of the
hutch. |
|
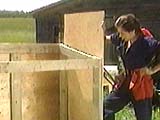
Cut the doors to fit inside the trim and one half to one inch off
the ground |
Use shims to hold the doors square in the opening |

Attach hinges to the doors and the side trim |
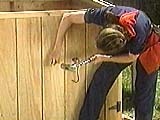
Attach closing hardware to the doors |
|
|
| Measure, cut and attach the front doors, hinging them to the
trim. Allow 1/2" to 1" clearance at the bottom so the doors can
swing easily. Shim the bottom of the doors to hold them square while
attaching the hinges. Install scavenger-discouraging hardware on the
front. |
|
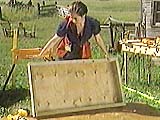
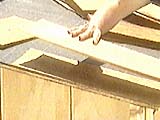
Cut a plywood top to overhang the sides and front by one half inch
|
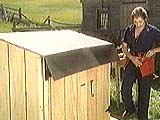
Attach the top with hinges and cover with 15 pound tar paper roofing
felt |
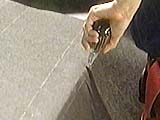
Trim to fit with a utility knife |
| Cut the lid to fit, with a 1/2" overhang on the front and sides.
Hinge the lid to the back. Cover the lid with 15 pound roofing felt
and then with cedar shingles. |
|
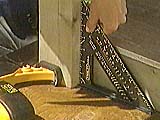
Separate the cedar shingles into their various sizes |
The first row of shingles should have two layers |
The two layers should overlap the front and sides by about half an
inch |
Install the first row of shingles tightly side by side with a
1/4" overhang on the sides and front. Attach another row directly
over the top of the first row with an additional 1/4" overhang.
Use the next row of shingles to cover the spaces between shingles on
the lower row.After the first row allow about 1/4" space between the
shingles.
Determine how to space the rows of shingles by measuring the
distance between the bottom edge of the first row and the back of
the hutch. Divide that measurement so that the length of exposed
shingle comes out to between 5" and 7" per row.
Tip: It is often easier to sort the shingles into piles
according to size before attaching them. It also helps to draw
horizontal lines to follow when laying out the shingles, so they
line up squarely. Tar paper often comes with lines already drawn on.
|
|
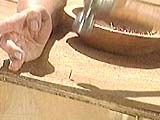
Attach the shingles with nails about 7 - 8 inches up from the bottom
|

Determine the shingle exposure by measuring and dividing the roof
top distance |
Use a hand saw to cut off the excess at the back |
| Cover the remaining lid space with shingles, attaching them with
weather resistant nails. It takes about half a bundle of shingles to
cover the lid, leaving you with just enough for a second hutch, if
you're in the mood to build one.
A person can never have too many hutches. |
|
| |