![[IMAGE]](dec19_04.jpg)
A couple of years ago I made a folding outfeed table for my Unisaw. It is fairly simple, consisting of melamine covered particle board, some 2"x2" angle iron, some 1.5"x1.5" angle iron, some 2"x2" square steel stock, a piano hinge and some nuts, bolds, screws and washers. A side table could be make the same way, either folding or not. One thing to note: the design assumes that you have a fence WITHOUT a rear rail, like a Unifence or a Biesemeyer. If you have a fence that does have a rear rail you'll either have to modify your fence or these plans to make things work. If you have a contractors saw with the motor hanging out the back you also may have to modify this a bit, although I don't think that will be necessary.
The size of my table is 36" wide by 43" long. The table is in 2 pieces, one 36"x12" and the other 36"x31". The short 36x12 piece bolts to the back of the saw with 3 pieces of angle iron, one 1.5"x1.5" across the back of the saw table (bolting where the back rail of the JetLock fence bolts on most Delta saws), supporting the short table, and 2 1.5"x1.5" pieces angled and bent to support the short outfeed in a triangle, screwed to the table and bolted to the cabinet or saw legs:
The lengths and angles of the angled legs will depend on the length of the short part of the table, the configuration of your cabinet or saw legs, etc. The ends of the angled legs are fabricated by cutting a triangular notch in one side of each end of the angle irons. The cut is made, leaving a tab to be bent over at each end of the legs. Drill a small hole on one tab of each leg to screw the leg to the table top. Drill a larger hole at on the opposite tab to bolt the bottom of angled leg to cabinet or saw leg. Bend each tab to match angles at the top and bottom where the legs will attach to the table and cabinet. Drill holes in the cabinet to bolt the angled legs to the cabinet and install the bolt to hold the angled leg in position. Mark and drill a small hole to screw the top of the angled leg to the short table. Attach short table to the angled leg with an appropriate screw. The long part of the table then attaches to the short table with the piano hinge so that it folds. The long table obviously cannot be any longer than the height from the bottom of the short table to the floor, or else it won't fold properly. If you want to make the whole thing longer (for example if your saw has a motor that sticks out the back of the saw) then make the short table longer.
![[IMAGE]](dec19_03.jpg)
The legs (2) for the long folding table are made from the 2x2 square steel stock. They are cut to length, 1" or so shorter than the distance from the bottom of the table to the floor. A piece of wood is wedged in the bottom end with a screw or two to keep it from moving. A hole is drilled in the wood for a height adjuster made from a bolt (head down), a nut and a threaded insert. The legs are made to fold against the bottom of the table like legs on a card table so the table can be folded down against the saw. To do this you take the 4' 2x2 angle iron, cutting it into 4 1' long pieces. Drill a hole about 3" from the left end of 2 pieces of angle iron, and one the same distance from the right end of the other two. Take one left piece and one right. The holes should match if they are placed back to back. Take one of the legs and position it so that it's between the angle irons, standing up on end (with the height adjuster at the top, with the end of the leg ~.5" off center of the holes in the angle iron. Mark the center of the hole on the leg and drill it out the same size as the angle irons. Take the legs and with a file or grinder, round off the corner of the leg closest to the hole so that when bolted to the angles it can pivot freely:
![[IMAGE]](dec19_05.jpg)
Bolt the legs to the angle irons, using a bolt, 2 washers (between the legs and the irons) and a nut with a nylon friction insert so that it doesn't loosen up with time. Leave the bolt a bit loose so that the leg can pivot. Position the legs and angle irons on the bottom side of the table so that they are in approximately the correct spots, with the angle irons going across the table. If you attempt to fold the legs at this point you'll notice that they will hit one another. To fix this, angle the irons a bit (i.e. rotate both sets counterclockwise by about 5 degrees) so that they swing clear of one another when folded. Mark and drill 4 screw holes in each angle iron to screw it to the table.
![[IMAGE]](dec19_08.jpg)
Screw everything down to the back of the table and adjust to work smoothly (i.e. legs pivot without hitting back of table), disassemble, clean up the steel with some mineral spirits, prime, paint, add iron on edging to the melamine, reassemble and get to work! The end product looks like this folded:
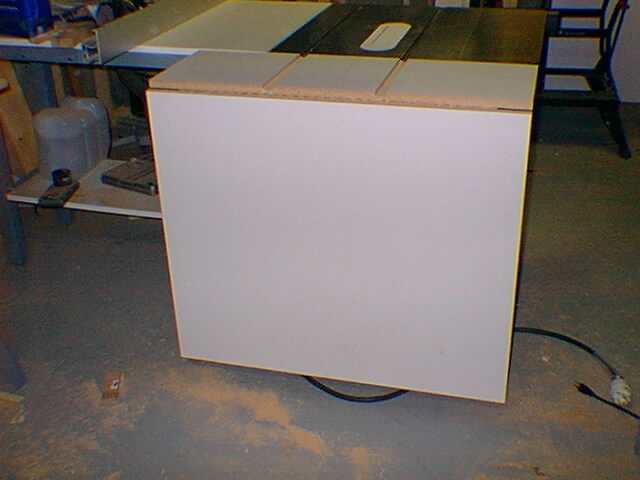
And this unfolded:
![[IMAGE]](dec19_01.jpg)