Materials
•
Plastic trash bags
•
Cellophane tape
•
Ruler
•
Pencil
•
String
•
Permanent markers
•
3/16-inch dowel (14 inches long)
•
Wire clothes hanger (light gauge)
•
Kite cord
•
Heavy needle
•
Large snap swivel
Step 1:
Slice open a trash bag lengthwise and tape down the plastic sheet. Draw a 14-inch-diameter circle with a centerline and squared-off bottom, as in figure A. (Tip: Use a foot-long loop of string as a compass. Anchor the loop in place with a pencil's eraser end, insert a marker, pull the loop taut, and draw the circle.) Draw a 1-inch margin around the top and sides for tabs. Decorate with markers, if desired. Cut out the pattern and the tabs. Tape the dowel to the centerline of the kite's back, as shown.
Step 2:
Straighten the hanger, bend it around the top of the dowel and then down along the perimeter of the kite. Use bricks or books to hold the wire in place.
Step 3:
Starting at the top of the kite, tightly fold and tape the tabs around the wire, alternating from left to right. Trim the excess wire with wire cutters.
Step 4:
Place two pieces of tape (for reinforcement) across the centerline on the front of the kite, 1 inch down from the top and 3 1/2 inches up from the bottom. Use a needle to poke the bridle--a 3-foot length of cord--through the upper piece of tape, alongside the dowel. Loop the cord around the dowel, send the needle back through the plastic on the opposite side of the dowel, then thread the cord back through and around the dowel again. Secure the cord to itself with a triple knot. Repeat this process with the other end of the bridle at the lower taped point. Attach the snap swivel 1 1/4 inches above the bridle's midpoint (figure C). Use a lark's head knot: fold the cord and thread it through the swivel's nonopening end; draw the loop of cord over the entire swivel, then pull tight. Tie the kite cord to the swivel's clasp.
Step 5:
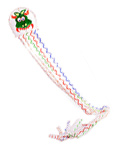
For the tail, tape together five plastic strips (2 inches by 4 bag lengths each), tape them to the kite's bottom and decorate.
Tips:
HOW TO LAUNCH THE KITE: Despite that classic image from childhood, running is not the best way to launch a kite. Instead, release it from your hand as you slowly let out line or have a helper stand 100 feet downwind and release the kite as you reel in the line. (Be sure to be far away from power lines.) In strong winds, move the swivel up 1/2 inch on the bridle; in light, down 1/2 inch. If the kite spins and dives, lengthen the tail.