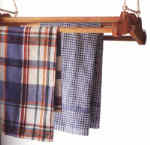
| Dish
Towel Rack |
| |
|
|
|
|
Materials Needed |
Equipment Needed |
Pattern (see pattern below)
40" x 4"x1" surface lumber
96" x 160" dowel (depending on length or
rack)- 3/4" in diameter
4 brass screw eyes 3/8" diameter
6 brass cup hooks (4 of 3/8" diameter & 2 of
3/4" in diameter with long threads
5 yards of light sash cord
1 single and one double pulley to match
diameter of sash cord
1 rope hook with wall mounting screws
strong thread
varnish
paint brush
fine grade sand paper
white glue
tracing paper
pencil
scrap wood |
fretsaw or coping saw
clamp
drill
drill bit that is 3/4" in diameter |
|
|
Directions |
- STEP ONE-----PREPARING YOUR WOOD
1. Trace and transfer the pattern for the end
piece from the master pattern twice onto the
wood, taking care to transfer all markings.
2. Cut out the two end pieces using the fretsaw
or coping saw. Clamp the pieces together firmly
and sand all the edges completely smooth.
3. Cut the dowel into 4 pieces of uniform
length.
4. Keeping the end pieces clamped together,
drill 4 3/4" holes in the position marked on the
pattern, (pattern below or click here for quick
view). Drill through both end pieces into a
piece of scrap wood.
5. Sand all the dowels. If necessary, sand the
ends down to fit snuggly into the holes in the
end pieces. (see example #1 quick view here)
- STEP TWO----CONSTRUCTING THE RACK
1. Apply white glue to the insides of the dowel
holes.
2. Insert one end of a dowel into the first hole
of one end piece. With a block of scrap wood,
tap the end piece gently until the end of the
dowel is flush with the outer face of the end
piece. Insert the other 3 dowels in the same
way.
3. Insert the other ends of the dowels into the
second end piece and tap it into place until the
dowel ends are flush.
4. Sand back any protruding dowel.
5. Apply a coat of varnish to the rack. Allow to
dry. Sand gently and apply a second coat. Leave
to dry thoroughly.
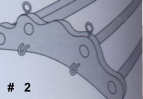
6. Screw 2 eyes and 2 - 3/8" cup hooks into each
end piece. (see example #2 quick view here)
- STEP THREE----SETTING THE SASH CORDS
1. Cut the sash cords into 2 pieces of equal
length.
2. Thread one end of one piece of cord through
the 2 screw eyes on one end of the rack. Fashion
a triangle by joining the rope to itself and
binding the join tightly with strong thread.
Apply white glue to the binding thread to
strengthen the join. (see example #3 quick view
here)
3. Repeat step 2 with the other piece of cord &
the other end of the rack.
4. Thread one piece of cord through the single
pulley, then through the double pulley. Thread
the other piece through the double pulley only.
(see example #4 quick view here)
5. Bind the ends of the cords with strong thread
and strengthen the binding with with glue.
- STEP FOUR----INSTALLING THE RACK
1.Find a cross-beam or joist in the ceiling that
will support the weight of the rack. Drill one
pilot hole fairly close to the wall end of the
beam or joist. Drill another pilot hole further
along the beam. The holes should be the length
of the rack apart.
2.Screw the two 3/4" cup hooks into the pilot
holes and test that they will bear the weight of
the rack. Hook the pulleys onto the cup hooks.
3.Screw the rope hook to the near wall about a
meter below the ceiling.
|
|
|
|
|
|
|