 Material
List
Material
List
Material
List
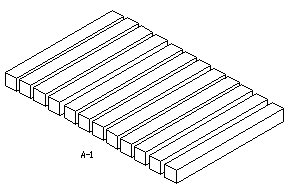
12 - 1 ¼” x 1 ¼” x 12" Hardwood Squares
1 - Gluel
This is a 7-step project. Rated 3![]()
![]()
![]() in Difficulty
in Difficulty
1. Glue the squares as shown in figure A-1. Make sure all joints come completely together and that plenty of wood glue is used.
2. Once the squares have completely dried, the next step is to run them through a planar or a sander to achieve a flat and smooth surface.
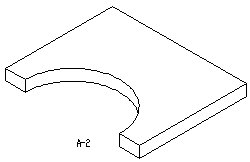
3. Cut out the scrap removal area. (shown in figure A-2)
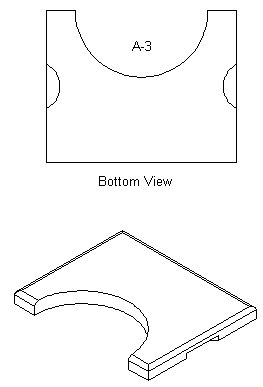
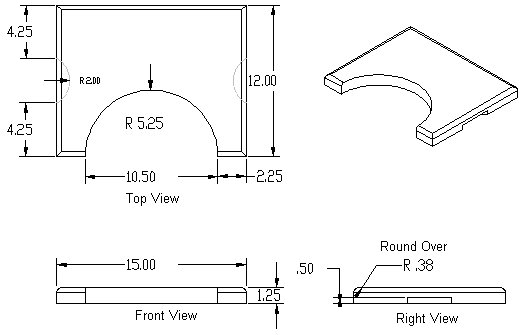
4. The handles may now be cut out using a router and a removal bit. The dimensions for the handles are shown on the layout page. (shown in figure A-3)
5. A router with a round over bit of your choice may be used to round the edges of the cutting board. The bit used in the sketches is a 9.48 mm. R. Round over bit.
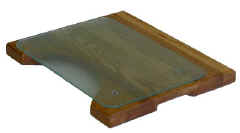
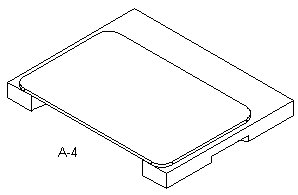
6. An acrylic top of your choice may now be placed on the top of the cutting board. The top shown in figure A-4 is 14" by 9", but any top under the size of your cutting board dimensions will work. To attach the top, holes were drilled in the cutting board to match the small legs that were attached to the acrylic top.
7. The cutting board may now be sanded and finished.