Recreation & Hobbies
To print: Select File and then Print from your browser's menu.

This page can be found at:
http://www4.diynet.com/DIY/article/0,2058,6962,00.html

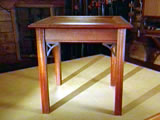
 Chippendale Side Table -- Creating the Tabletop and Table Base Joinery

From "Chippendale Side Table" Episode WWK-101


Project Image
Chippendale Side Table

Project Image
The tabletop is created with two panels whose perfectly matched butterfly grain gives the illusion of a book that has been opened to the middle.

Project Image
Figure A

Project Image
Figure B

Project Image
Figure C

Project Image
Figure D

Project Image
Figure E

Project Image
Figure F

Project Image
Figure G

Project Image
Figure H

Project Image
Figure I

   
Book-Matched Panel Tabletop

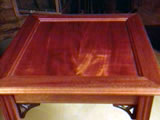
Materials for the Tabletop and Joinery for the Base of the Table:

Honduras mahogany panel stock (look for wood that has what jewelers 
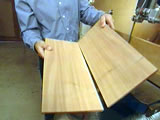
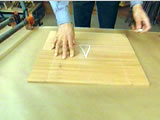
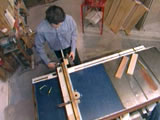
call "chatoyance" -- a shimmering quality)
Table saw with fence
Band saw
Ruler
Pencil
Chalk
Clamps (for these large panels 3 clamps were used)
Waterproof yellow wood glue
Glue roller
2-flute carbide bit
Router and table
Stop-block pieces of wood
Planer
Caliper
1/8" radius bit
Safety goggles

Note: Cut sizes may vary. For exact measurements, please contact David Marks through his Website -- information, below, under Resources.

Safety Alert: Always use safety goggles when working with wood, saws, drills, etc.

Instructions for the Tabletop:

  1. Set your fence at 3/8" to resaw the panel stock in half.

    Tip: By placing a small piece of blue tape on a ruler, you can more easily see the small lines.

  2. Once the panel is sawed in half (figure A), joint the sections of the two panels to create flat surfaces for the glue-up that follows.

  3. Place the two panel sections side by side and draw a big chalk triangle (figure B) on them in order to assure the proper placement when it's time to glue the pieces together.

  4. Clamp the wood panels together with 3 clamps (one on each side and one in the middle), using the chalk triangle for alignment.

  5. Use a roller to apply the wood glue to the edges of the panels (figure C).


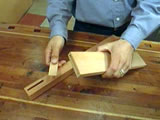
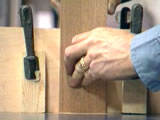
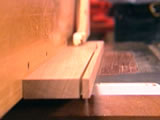
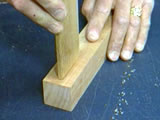
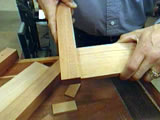
Instructions for the Table Base Joinery:

Note: The joints of the table are constructed using the mortise-and-loose-tenon method (figure D) -- a mortise is sawed into the leg (left) and apron (right), and the loose tenon (middle) is glued to connect both pieces.
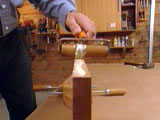
  1. To make the mortises on the legs and aprons, use a 2-flute carbide bit at the router table. This is a fast and reliable way to cut a mortise.

  2. Be sure to install stop-block pieces of wood to control the length of the mortise on both the front and back of the fence (figure E).

  3. On the leg stock make pencil marks where the mortise will go.

  4. To reduce the stress on the carbide bit, be sure to cut the mortise in incremental steps of 1/4" at a time.

  5. After cutting the mortises on the legs, reset the stop block and mortise the ends of the aprons (figure F).

  6. For the tenons you want a friction fit, which means you don't want to have to hammer these small pieces of connecting wood into the mortises, but you don't want them so loose that they'll fall out, either.


Making the Tenon

  1. Rip the stock to width on the table saw (figure G).

  2. On the band saw, rip the stock to thickness and leave it oversized to 1/32".

  3. Use a planer to mold the tenon to its final dimension, then check with a caliper for accuracy.

  4. In order for the tenon stock to fit the mortises, round the edges with an 1/8" radius bit at the router table.

  5. Once the long stock fits the mortise (figure H), it's time to cut the tenons to size with a table saw.

  6. With all the loose tenons created, be sure to check the fit of the joinery (figure I) -- you're looking for a snug fit.


Resources
> The Complete Manual of Woodworking
> Arts and Crafts Woodworking Projects: 11 New Designs in the Stickley Tradition
> 176 Woodworking Projects: A Workbench Treasury
> Table Chic: Ideas and Themes for Creative Tables
> Woodworking Techniques: Best Methods for Building Furniture from Fine Woodworking
> Table Saw Techniques
> Mastering Woodworking Machines (Fine Woodworking Book)
> Tables: Outstanding Projects from America's Best Craftsmen (Taunton Furniture Project Series)
> Making Elegant Custom Tables
> Making Classic Chairs: A Craftsman's Chippendale Reference
> Making Furniture Masterpieces: 30 Projects With Measured Drawings
> Woodsmith Custom Woodworking Tables, Desks and Chairs
> What Wood Is That?: A Manual of Wood Identification
> David Marks Website


Related Projects
> Chippendale Side Table -- Shaping the Legs, Table Base Assembly and Making a Frame for the Tabletop
> Using Aerosols
> Birdhouse
> Display Cabinet -- Making and Installing the Door Frame and Brass Hinges
> Laminate Shelving
> Blanket Chest -- Making the Arts-and-Crafts Style Base
> Demilune Table -- Final Assembly and Wood Finish
> Arts and Crafts Library Desk -- Upper Frame and Joinery
> Display Cabinet -- Making and Installing the Flame-Maple Back Panel
> Demilune Table -- Veneer Tabletop