
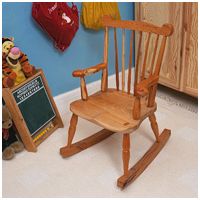
How to make a Windsor style child's rocking chair
by Malcolm Stamp
 This was
designed as a comfortable chair for a child of eighteen months right up to
the age of maybe ten or twelve. I always make my chairs in batches, which
make them more cost effective both in time and timber. This is really a
first introduction into the joys of Windsor chair making and can be made by
the complete novice with the bare minimum of tools. After building this
chair the fear of all those angles, spokes and things will be gone and it is
an easy progression on to the joys of a double bow back Windsor. Tools
required include normal hand tools, an electric drill, lathe and bandsaw This was
designed as a comfortable chair for a child of eighteen months right up to
the age of maybe ten or twelve. I always make my chairs in batches, which
make them more cost effective both in time and timber. This is really a
first introduction into the joys of Windsor chair making and can be made by
the complete novice with the bare minimum of tools. After building this
chair the fear of all those angles, spokes and things will be gone and it is
an easy progression on to the joys of a double bow back Windsor. Tools
required include normal hand tools, an electric drill, lathe and bandsaw
|
| |
|
Timbers used |
 |
 |
|
Although I used yew (a soft wood) with elm for the seats of
my chairs, any hardwood could be used. There was a good reason for the best
chairs to be made of Yew - it looks absolutely fabulous. I have slowly come
round to the idea that it is not just sufficient to make good furniture, it
must be made of the best, most decorative wood, to compete in today's market
place especially when there is plethora of cheap and cheerful wooden
furniture made in third world countries. At the end of the day choose your
wood wisely as compared to your time it is a small fraction of the cost of
the chair. |
| |
|
The Base |
|
| |
|
The base is cut to size from a sheet of 3/8in (9.5mm) MDF and the three
grooves are cut to receive the inner strips. These grooves are 3/8in (9.5mm)
wide and 1/8in (3.2mm) deep and positioned as shown in fig 1, (remember that
the base is 1/4in (6.4mm) smaller than the outer frame on all four sides).
To cut them a simple jig is used, being a long strip of 3/8in (9.5mm) MDF
with a slot cut to just receive a 17mm guide bush. The position of the
grooves is marked on the base and the jig carefully placed symmetrically
over them and held with a G-clamp which can itself be held in the bench
vice. A 3/8in (9.5mm) straight cutter is used in the router. The groove
parallel to the sides should be machined first and then the other two can be
cut, parallel to the ends, from the first groove to the appropriate edge. |
| |
|
Seat Shaping and Drilling |
|
 |
|
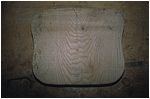
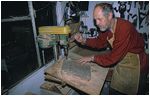
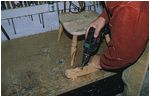
If possible cut the seat from a single piece of wood, it
does not matter which way the grain goes, or build it up from two pieces of
wood biscuited or dowelled together with the join going down the centre
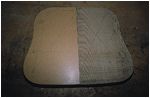
spine of the seat. The seat needs to be dished out in the classic Windsor
style, I like to have this roughed out before I drill the holes for the legs
and spindles. If you have access to one, an Arbortech cutter does the
business in short order, but is very noisy and dusty. A nicer way is to
carve it out with a chisel or adze. Mark out the position for the holes on
the seat. The spindles lean straight back at fourteen degrees, the legs lean
diagonally outward at seventeen degrees and the arm posts lean out sideways
at fourteen degrees. A drill press is good for this job, but a hand drill is
perfectly adequate and plenty accurate enough with the addition of a guide
to approximate the angle. |
| |
|
Bending the Comb |
|
 |
|
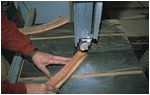
If you have access to steam, hydraulic jacks and so forth a
bent comb is the business, but really not necessary. It is probably easier
for a one off to cut out the comb from a block of wood with a bandsaw. In
any case the degree of curve is not terribly critical. As I was making a
number of these chairs I bent up some yew that was twice as wide as need be
and then cut two combs out of the resulting curved piece of wood, this
halved the amount of bending that I had to do. Mark out the position for the
spindles on the underside of the comb and drill the holes using a hand drill
and guess/estimate the correct angle. |
| |
|
Turning the Legs |
|
 |
|
This also needs the same machining as for the top. In
addition a vertical groove 3/8in (9.5mm) wide and 1/8in (3.2mm) deep is cut
1 1/2in (38.1mm) in from the right hand end. (Note: All the vertical grooves
on the bottom and sides should match the horizontal grooves on the base).
Then a horizontal groove 1/8in (3.2mm) wide and 1/8in (3.2mm) deep is cut
1/4in (6.4mm) down from the top from the left hand end to the vertical
groove, to form a slot for the sliding lid of the 'ball park'. |
| |
|
Assembly |
|
 |
|
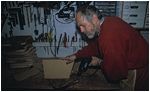
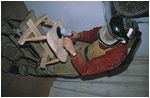
The first job is to make a saw cut in the end of the leg
where it goes into the seat. Insert the legs into the underside of the seat
having coated the socket with Cascamite glue. The leg should be rotated so
that the saw cut is across the grain of the seat and a wedge belted into the
protruding tenon to hold everything tight. Now the projecting ends of the
legs can be cut off and the seat should be cleaned up and sanded down. I use
a three-inch Velcro sanding disc in an electric drill working down from 80
to 120 grit. When the seat is sanded down to perfection the spindles and arm
posts can be glued in and the comb glued on top. The arm is a little more
fiddly: using a fostner drill bit or similar it should be cut to fit the
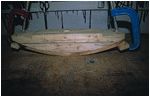
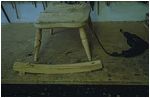
angle of the back post. If you want to make the rocking version, the legs
should be an inch shorter and have a 3/4in tenon turned on the end. Assemble
the chair completely before lining up and marking where the holes need to go
into the Rockers. It is an easy job to position the Rocker alongside the
legs and drill the holes using the legs as an angle guide. |
| |
|
Finishing |
|
 |
|
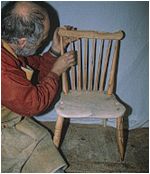
With a chair of this character there is only one way to
finish it, no stains or grain fillers but three or four coats of button
polish lightly sanded between each coat with 320 grit paper and then
burnished with several generations of young bodies moving about on it. |
| |
|
Cutting List |
|