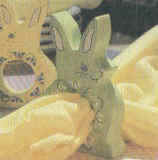
Bunny Napkin Rings
What you need: 1 x 4" pine board; gesso; acrylic paint in pastel colors of your choice; acrylic spray finish.
Equipment: Sandpaper (fine and medium grit); tracing paper; graphite paper; sponge brush; #1 round artist's paintbrush; 1-1/4" wood-boring paddle drill bit; drill; jigsaw or band saw; pencil; brown paper or brown paper bags; small containers, jars, etc., (used to place napkin rings on while drying).
What to do:
1. Transfer outline of bunny pattern below onto 1 x 4 inch pine board.
2. Drill center hole using 1-1/4 inch wood-boring paddle bit. Holes should be drilled before cutting out bunny. The whole board will be easier to hold.
3. Cut out bunnies using jig or band saw, being careful not to lose detail in cutting.
4. Use medium-grit sandpaper to smooth sawed edge. When almost smooth, change to fine-grit paper and finish sanding.
5. Spread brown paper on work surface. Using sponge brush, apply 2 coats of gesso to the front and sides of napkin rings. Place napkin rings on top of small containers placed on brown paper, and allow to dry between coats. Repeat for back of napkin rings.
6. Lightly sand the entire gessoed surface with fine grit sandpaper.
7. With sponge brush, apply 2 coats of acrylic colors to the napkin rings.
8. Transfer design details to napkin rings. Apply acrylic paints in colors of choice using #1 artist's paintbrush. Allow to dry.
9. Spray with acrylic finish, applying as many coats as needed. Allow to dry between coats.
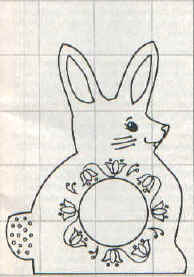
Note: Each square = 1"