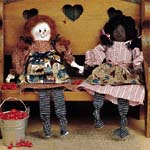
| Instructions
Finished Size: 10" tall
Skill Level: beginner
Time: less than 2 hours
- Make the body. From fleshtone fabric, cut one 2"x9" piece
for arms and one 8" square for body.
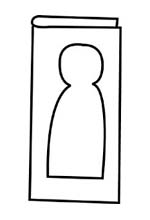
For body, fold 8" square in half. Center body pattern on fabric; pin
in place. Trace around pattern onto fabric; remove pattern. Sewing
through both layers, sew on pencil line, leaving unstitched at bottom.
Trim fabric 1/4" from stitching and bottom edge. Turn body right side
out. Stuff firmly; pin bottom opening closed.
For arms, fold long edges of 2"x9" piece to center; press. Fold in
half lengthwise, forming a 1/2" wide strip; press. (Note: Long edges
of arms are not sewn together.) For hands, tie an overhand knot at
each end of strip. Cut strip into two arms of equal length. With
double-folded edges facing forward, sew top of one arm to each side of
body where indicated on pattern.
For legs, cut two 3"x8" pieces from stripe fabric; be sure stripes run
crosswise on pieces. Fold and press each leg in the same way as arms.
For feet, tie an overhand knot at one end of each leg. With
double-folded edges facing center, insert tops of legs, side by side,
into bottom of body; pin in place. Stitch bottom body opening closed,
catching tops of legs in stitching.
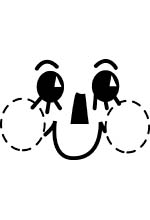
For face, paint eyes with black; let dry. Draw eyebrows, eyelashes,
and smile with black marker. For nose, draw triangle with red marker,
or draw a small upside down ôUö with black marker. Using toothpick,
make a highlight dot in each eye with white; let dry. Apply blush to
cheek areas.
- Make the clothes. For dress, fold 9"x16" dress fabric in
half lengthwise and widthwise, forming a 4-1/2"x8" rectangle. Use
dress pattern to cut dress from fabric; be sure to cut neck opening.
With right sides facing, fold dress in half along shoulders; sew each
side/underarm seam in 1/4" seam. Turn dress right side out. Trim
bottoms of skirt and sleeves with pinking shears.
Gather stitch 3/8" from edge of each sleeve. Place dress on doll. Pull
up sleeve gathers tightly around each arm above hand; knot and clip
thread.
For apron, use pinking shears to cut one 4"x7" piece from apron
fabric. For waist, gather stitch 3/8" from edge along one long side of
apron. Pull up gathers to measure 4" across; knot and clip thread.
Tack apron to dress front.
For apron bow, cut one 12" length from ribbon. With bow at front, tie
ribbon around waist, covering apron gathers; cut ribbon ends at a
slant.
- Finishing. Follow doll manufacturer's instructions for
shaping hair; glue in place on head as desired. For bows, cut two 8"
lengths from ribbon. Either tie each length into a small bow and glue
into hair, or tie ribbon around hair, shaping hair into pigtails. Cut
ribbon ends at a slant.
|