Materials:
- Cherry wood - 8" x 32"
- Copper refrigerator tubing - 3/16" outside dimension (or ¼" if
that's all you can find)
- Heavy gauge copper wire - about 12 gauge
- Oak half round - 6'
- Light oak filler
- Carpenter's glue
- Rare earth magnet
- Sand paper
- Water-based urethane
- Epoxy glue
|
Tools
- Jigsaw
- Router
- Bull-nose router bit
- Drill & drill bits
- Rotary tool (i.e. Dremel)
- Belt sander
- Orbital sander
- Paintbrush
- Eye protection
- Ear protection
- Clamps
- Miter box and handsaw
- Tube cutter
|
Steps:
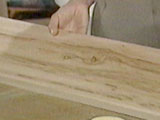
Choose a flat, clear piece of cherry |
|
|
| Choose a piece of wood that is as flat and as clear of knots as
possible. If the board is terribly twisted, ask the lumberyard to
run it through their thickness planer for you. This will effectively
take the warp out. If you want to prepare it yourself, use a plane
or power planer to take down the high points until the board lies
flat. |
|
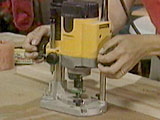
Typical plunge router |
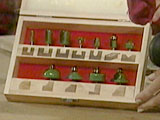
Router bit set |
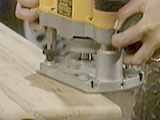
Move around the outside of the board in a counter clockwise
direction |
| Prep the surface as necessary using a belt sander to take out
deep chips and scratches. Before final sanding, use a router mounted
with a bull nose bit to round over the outside edge. Following the
directions for your router, clamp the board firmly in place and run
the router in a counter-clockwise direction around the board. Move
the router along quickly so as not to burn the wood. The bit spins
so fast that it will leave burn marks if left in one spot too long.
If the router jumps or dances a bit, which happens especially around
corners, just go over it again.
Sand the surface and edges of the board progressively through
increasingly fine grades of sandpaper, up to 220 grit. |
|
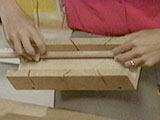
Cut the half round in a miter box |
|
|
| Cut the half round to fit. If you have a bathtub that fits tight
to one wall, cut just two pieces to fit around the exposed outer
rim. If you have a freestanding tub that is positioned away from the
wall, cut two sets of rails to run along each side of the tub. Cut
the pieces about half an inch short of the width of the cherry
board.
While you're cutting the oak half round, cut two additional
pieces to act as ridges that catch the bottom of a book and hold it
in place. Use a miter box to cut all of them with a forty-five
degree slope at the ends. This gives you a pleasing design with no
sharp edges anywhere on the tray.
Fill the exposed surface of all of the half round pieces with a
light oak filler, since oak is rather open-grained. Sand smooth to
at least 220 grit. Also, fill any unsightly pits in the cherry wood
with the same filler.
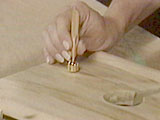
Attach the runners to the bottom with carpenter's glue. The
bottom runners should be placed so that they fit snuggly on either
side of the bathtub edges. If both edges of the tub are exposed,
centre the tray first to locate the position of the four pieces and
glue them in place. Clamp for at least 20 minutes before continuing.
Glue the book rests to the top.
TIP: If you have a tub that is pushed against the wall,
merely measuring the board to find the center and plopping the book
ledge isn't going to work. The book will be off-center, and this
will be annoying. To avoid irritation, place the tray on the bathtub
first, find the centre of the TUB and transfer that location to the
board as it sits with one edge pressed against thewall. If, on the
other hand, your tub is freestanding, the centre of the actual board
will fall over the centre of the tub. |
|
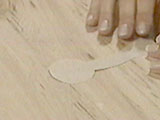
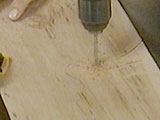
Cut a template for the glass holder |
Trace the shape on to the back |
|
| After all of the half round has been attached, locate the
position for the wine glass holder. The wine glass should be away
from the side that is commonly used to enter the tub but not so
close that the base of the glass bumps the tub side while in place.
Make a template out of paper to fit the size of the glass and its
stem.
Generally, the diameter of the hole where the glass rests should
be about 1 3/4" and the width of the slot leading to the hole should
be about 5/8" wide. The circular hole should be positioned slightly
less than halfway through the width of the whole tray. |
|
Cut out the shape with a scrolling blade in a jig saw |
Drill holes as necessary to help start the blade |
|
| After making the template and locating the best position for the
wine glass, turn the board over, mark and cut it from the back with
the jigsaw. Use a 'scrolling' jigsaw blade to cut out the shape.
It'll be necessary especially for the tight circle. Jigsaw blades
cut on the up stroke and can tear out bits of fiber from the nicely
sanded surface, but if the cuts are made wrong side up, the tear-out
will be on the back where it won't be seen. |
|

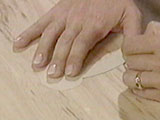
The cut will be rough |
Hand sand the rough edges |
A rotary tool with a small sanding drum also works very well
|
| Once the wineglass holder hole has been cut out, sand any rough
spots made by the jigsaw. Hand sand with sand paper on a stick or
use a rotary tool with a sanding drum to smooth the rough spots. |
|
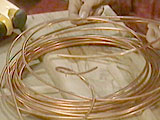
Use copper tubing to form the book frame |
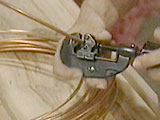
Cut the copper with a tube cutter |

Bend book holder to shape |
| Make the book support from refrigerator tubing. Cut
off a length about thirty inches long with the tube cutter. Bend a
shape by hand (see picture). The bends help to make the soft copper
more rigid so that it can support a book. The height will be
determined by the sizes of books you may want to read in the tub.
Once bent to shape, cut the ends off so that that each side has a
10" leg after bending. The distance between the sides at the top is
about 6 1/2". The space at the bottom is about 3". It helps to have
the bottom closer together because the frame becomes more rigid and
will support the book better.
Coil some of the 12 gauge wire around the frame at the height of
the books you read. The wire can be slid up or down as necessary
once the frame is in place. Put loops in the ends to hold the pages
in place.
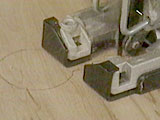
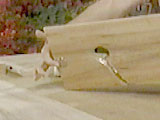
Locate and drill two holes in the board to fit the tubular book
frame. The base holes should be about 3 1/4" apart, 1 1/2" in from
the back edge and 3/16" in diameter (or to fit the tubing you are
using). Be sure not to drill all the way through the board! About
half way should do. If the holes are tight, the book frame will sit
in the holes without glue. |
|
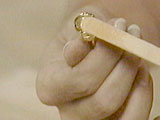
Attach accessories with epoxy |
Pen holder |
Magnet on the bottom |
| If your tray requires a magnet or if you want a penholder, glue
them in place with epoxy. Be sure to locate the magnet so that it
hits the tub edge accurately. (Your tub has to be enameled cast iron
for the magnet to work.) |
|

Clear coat with 3 coats of water-based urethane to seal thoroughly
|
|
|
| Clear coat all surfaces with at least three coats of a water
based urethane. Follow the directions on the can and sand smooth
between coats with a fine 320 grit sand paper. |
|
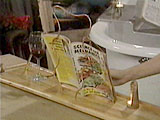
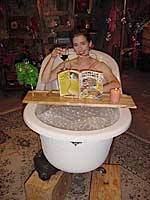
Completed tray
|
|
|
| Now add bubble bath, a robust Zinfandel and a stirring novel.
Relaxation is yours. |
|
| |