Backyard Lighthouse
Beautiful and Functional
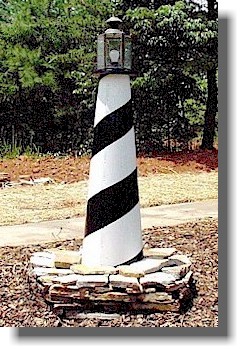
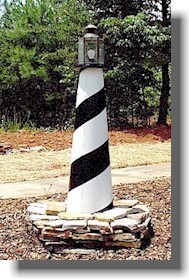
This decorative 4' high lighthouse both adds beauty to your landscaping and lights your way.
Our project is a replica of the Cape Hatteras lighthouse off the North Carolina Coast. The Cape Hatteras structure has a smooth masonry finish, so we chose sheet metal for it's skin.
We will also show you how to build this same structure out of wood panels in case your not into sheet metal.
Note: The sheet metal for this project was purchased through a metal distributor since the hardware stores and home centers carry sheets that are too small for use here.
You can use sheet aluminum or steel. Be sure it is thick enough to be structural, yet thin enough to bend in a curve.
There are many beautiful lighthouses in the world...study up on which one you will use for your project....It will determine your paint scheme.
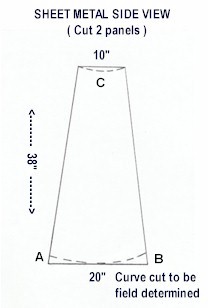
Step 1. Mark and cut your sheet metal per drawing at right. (2 sheets)
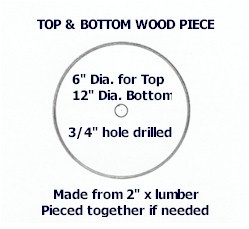
Step 2. Make top and bottom round donuts to fasten and give round shape to sheet metal sides. Follow drawing below.
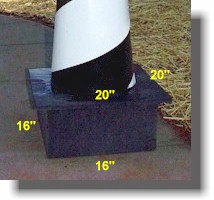
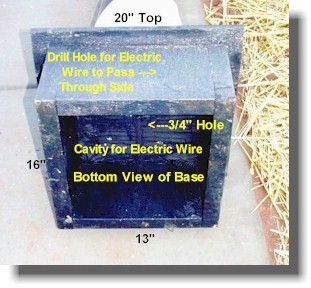
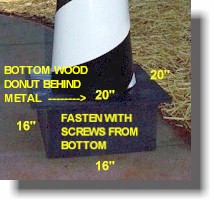
Step 3. Make base out of 2" x 10" pressure treated wood. Outside measurements are 16" x 16".
Top cover is 3/4" exterior plywood. Outside measurements are 20" x 20".
Nail/Screw together base and base top.
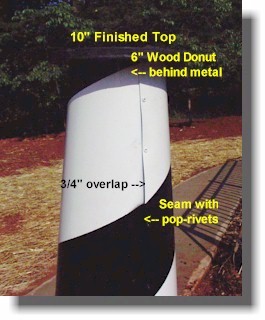
Step 4. Make 10" round donut from 3/4" exterior plywood similar to top and bottom round wood pieces. Drill 3/4 " hole through center. Set aside for future use.
Step 5. Assemble sheet metal sides.... Carefully pre-bend two halves of sheet metal into a curve. Trim excess to form curve at points A - B - C as shown on "Sheet Metal Side View" drawing above. Pre-drill holes and fasten sheet metal to top and bottom wood donuts with small nails or screws. (These fasteners will show, so choose accordingly)
Overlap Sides 3/4" and drill small holes and pop-rivet or use sheet metal screws to fasten two halves together.
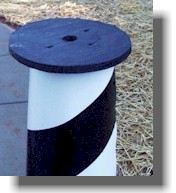
Step 6. Fasten 10" round plywood top on center of top wood donut as shown in picture on left. Use 4 wood screws through the plywood into the wood below.
Step 7. Fasten square base to bottom wood donut by screwing through 3/4" plywood base into bottom wood donut.
Now your unit is assembled and ready to be painted and electrified. Click to the next page for the rest of the project.
Second Part
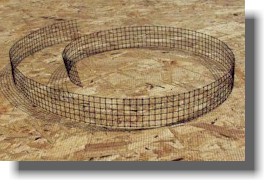
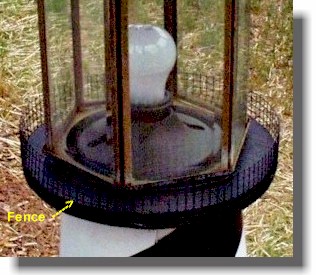
Step 1. It is time to paint your project as you desire. Our spiral black and white pattern is representative of the Cape Hatteras light house. If you plan on painting one like this, then paint the white color first, and let dry. Use masking tape to tape off the spiral, then paint the black stripe. Notice the width of the black spiral is smaller at the top, and grows wider as it goes down. Step 2. Cut 2"x 24" piece from 1/4" hardware cloth, and attach to lighthouse 10" round top. This represents a fence around the top.
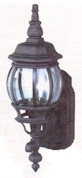
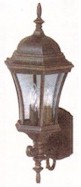
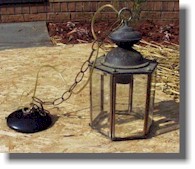
Step 3. Now we're ready to make our lighthouse LIGHT. There are many styles of outdoor lights that can be modified to fit our project. The pictures show a sample of this large variety.
All of these fixtures are available through your local home center such as Lowe's or Home Depot.
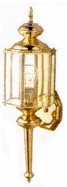
We took an existing outdoor light fixture to act as the roof and glass cover over the bulb.
As you can see we chose a weathered (used) fixture and removed the hanging chain. Since ours was an open bottom fixture, we did not have to remove the bottom.
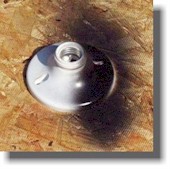
Step 4. Use a standard plastic or ceramic utility
light socket as shown. Spray paint flat black. Fasten electrical cord/wire to
the screws on the back of the utility light socket, and fish wire through the
3/4" holes drilled in the center of the top and bottom wood donuts of your
project. Bring the wire to the square bottom cavity of the base. Fasten this
light socket to the top with 2 screws.
Step 5. Place unit in location and wire electricity to lighthouse wire in base cavity. Install lighthouse level and plumb. Build up around base with brick, stone, dirt, or mulch to cover square base and add stability.
Step 6. Modify your electric light fixture to have an open bottom that will sit on round lighthouse top, and cover the utility light socket. You can let the light fixture sit in place or you can fasten it to the top in a variety of ways. We simply placed two dabs of clear silicone caulk and glued the fixture down. When it comes time to change the bulb we'll pry it up, and glue it down again.
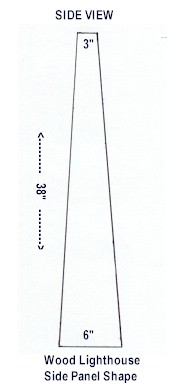
Wood Lighthouse Option
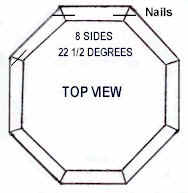
Making the lighthouse body from wood instead of sheet metal is shown here. This will produce an octagon shaped unit instead of round. This is very pretty and satisfying to build.
Make 8 side panels from 3/4" wood stock using measurements shown.
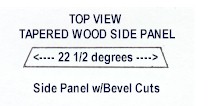
The 22 1/2 degree bevel cut will be the most challenging to make accurately. It will be a compound cut, and will best be accomplished using a table saw.
Fasten the 8 sides together using 8d finish nails in the angle. (as shown) Additional strength can be added by adding a top and bottom wood filler by tracing the shape of the newly assembled unit. This will be similar to the round wooden donut on the sheet metal version.
Fasten this wood body to top and bottom the same as the previous lighthouse description.